Project introduction
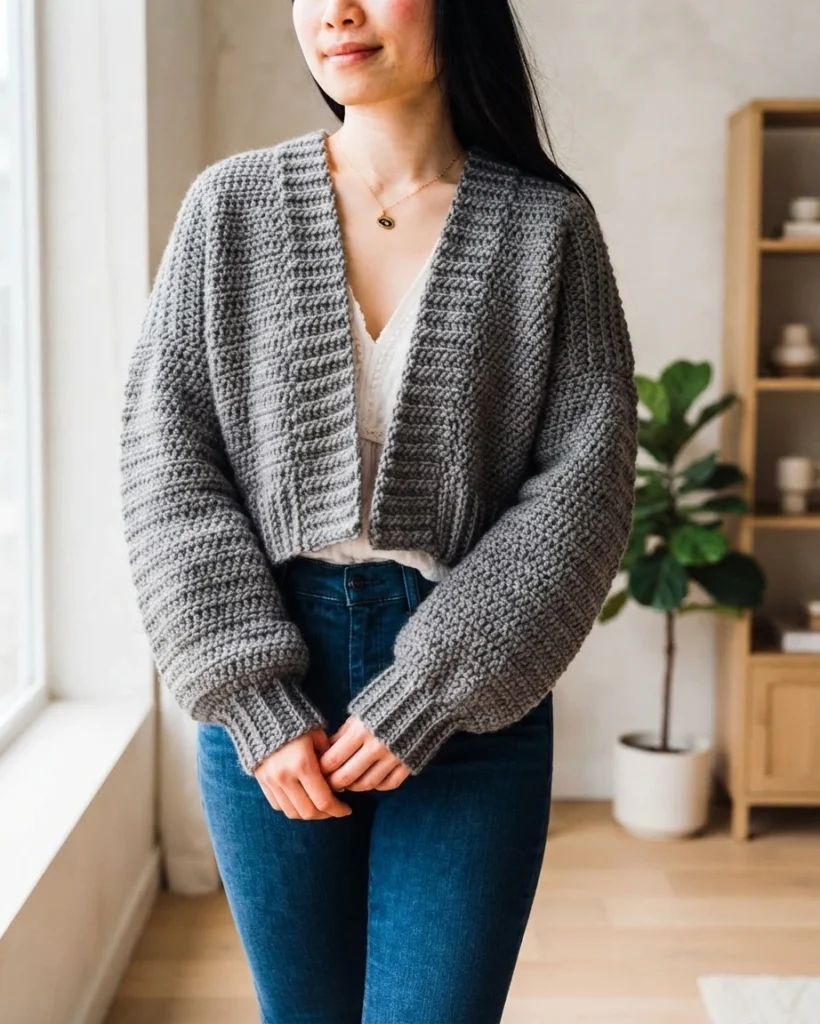
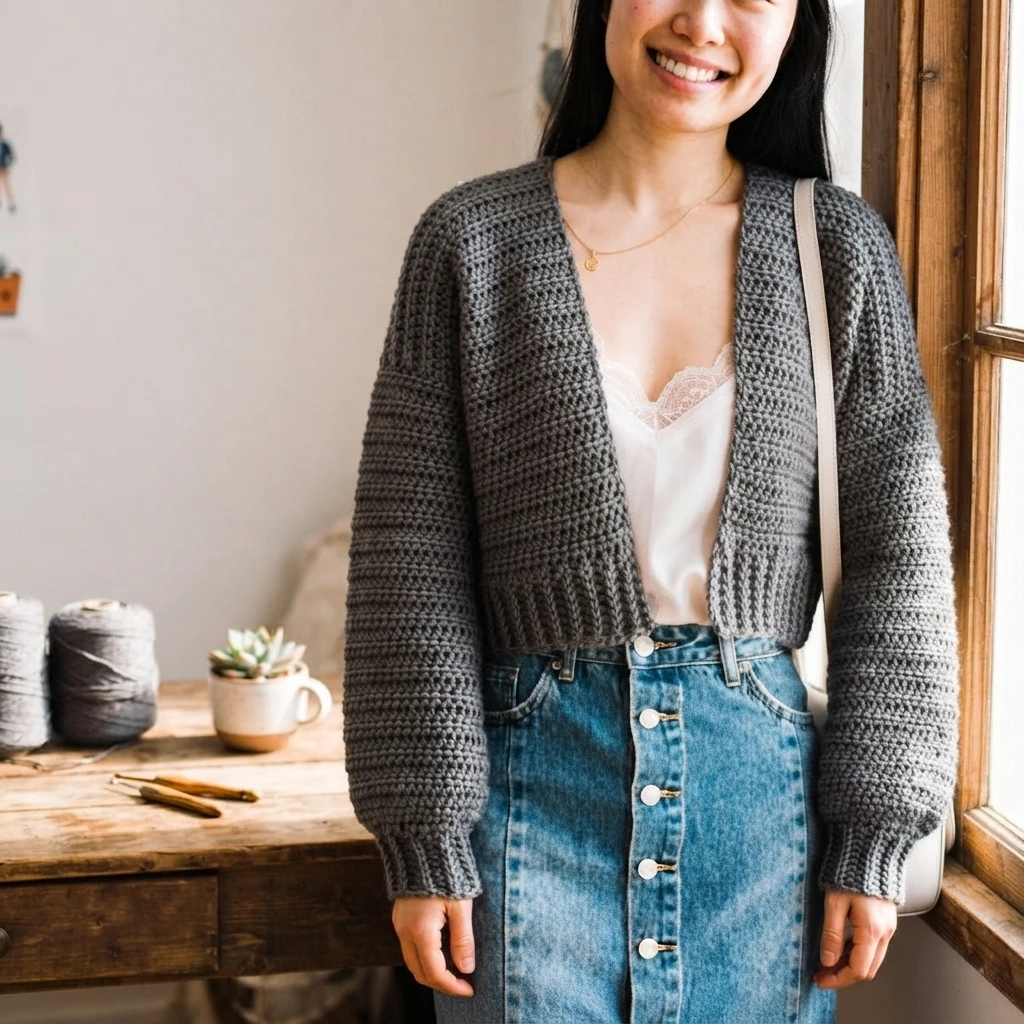
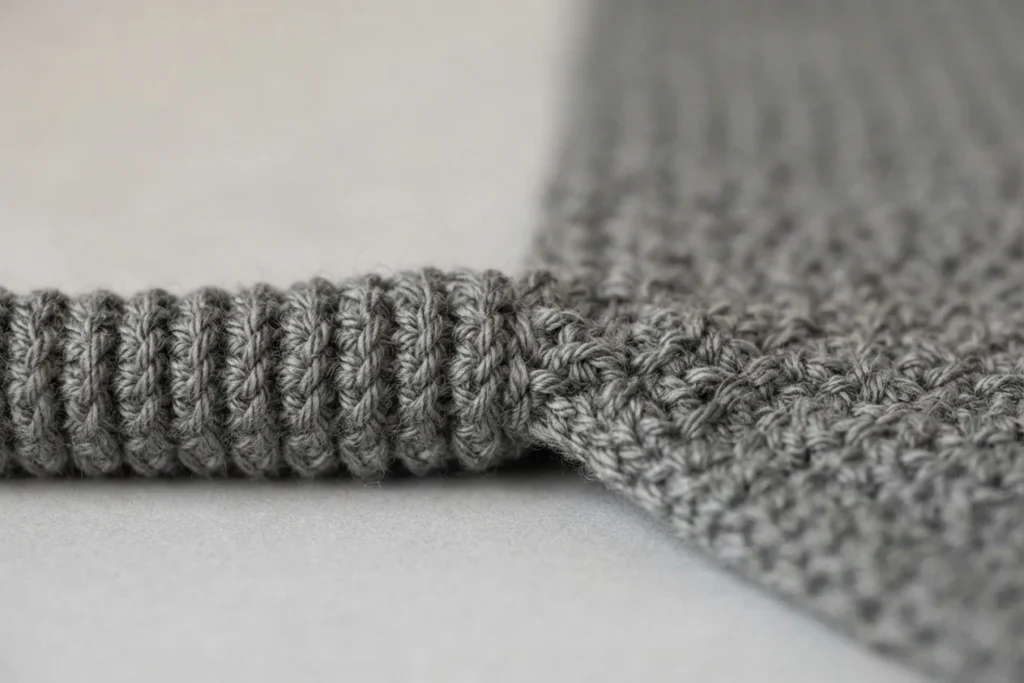
The Doveport Cardigan is an oversized crochet sweater from For the Frills, designed for beginners. It features a boxy silhouette and balloon sleeves similar to the earlier Briar Cardigan but replaces post stitches with knit-look ribbing created using back loop half double crochets and slip stitches. This technique provides a polished finish on the hemline and cuffs. The pattern allows for customizable body length and includes three distinct options for finishing the neckline.
This overview covers construction methods, yarn requirements, sizing information, and access options. Written instructions and a video tutorial are available for free on the For the Frills blog, while an ad-free printable PDF version can be purchased separately.
Construction starts with ribbing made from back loop stitches to create texture. Both the body and sleeves begin with their respective hem or cuff ribbing, after which the main fabric is worked along the long edge of that strip. The body panel is crocheted as a single continuous piece, which reduces final seaming. While the sample shown is cropped, makers can adjust the length to hip or knee level by adding rows to the main body section.
Once the body panel is complete, it is divided into three sections: two front panels and one back panel, creating openings for the sleeves. The balloon sleeves are worked from the cuff upward and require only two rows of shaping. Assembly involves folding the front panels over the back, sewing the shoulder seams, and whip stitching the sleeve tops to the armholes.
Makers who wish to reduce seaming further have the option to work the sleeves in the round.
Addressing common questions about the previous Briar Cardigan regarding neckline ribbing, the Doveport pattern includes instructions for three different finishes. This allows crafters to choose the style and amount of sewing that best fits their preference.
The slip stitch edging offers a clean, minimalist look and is considered the easiest method for beginners. Success depends on maintaining even tension and consistent spacing between stitches. Stitches placed too far apart cause puckering, while too many stitches result in ruffling. The process involves working a chain 1 followed by evenly spaced slip stitches along the neckline edge before fastening off.
For the separate ribbing option, the strip is pinned to the neckline and then whip stitched into place. The source notes this as the most forgiving ribbed finish for those new to adding ribbing.
When attaching ribbing directly to the body, a frequent error is assuming a one-to-one ratio between body panel rows and ribbing rows. Due to variations in gauge, this often leads to fit issues. The designer suggests experimenting with spacing, noting that four ribbing rows for every three body half double crochet rows worked well for the sample, though individual results may vary based on yarn and tension.
Matching gauge when working ribbing directly onto the garment can be challenging, leading to inconsistent results depending on skill level. Crocheting the ribbing separately ensures a more uniform outcome across various yarns and experience levels. Additionally, adjusting tension on an assembled cardigan is time-consuming and cumbersome due to the weight of the fabric.
Both methods are valid, so makers should select the approach they find most comfortable.
Lion Brand Heartland is recommended for its variety of colorways, offering over 30 shades. Its heathered composition mixes similar tones to add depth and interest compared to solid colors. Note that Heartland sits on the thicker side of worsted/aran/medium (4) yarns. If substituting, choose a similarly thick aran yarn to help match the pattern gauge.
A step-by-step video tutorial accompanies the free written pattern, supporting beginners through the process. The cardigan is constructed flat using half double crochets and slip stitches, with the body worked in one piece and sleeves sewn on. The pattern uses US terminology and sizes ranging from XS to 5XL. Single numbers apply to all sizes, while multiple numbers correspond to the size order.
Total stitch counts are indicated within angle brackets, and the turning chain of 1 does not count as a stitch.
Length adjustments are made by adding or removing rows. Approximately 12(12, 14, 16, 18)(18, 20, 20, 22) g of additional yarn is needed for every 2 cm (0.75 in) of added length. All pieces are sewn together with the right side facing inward.
You will need Lion Brand Heartland (aran/worsted/medium 4), specifically the Petrified Forest colorway. Approximate quantities range from 415(485, 545, 595, 670)(735, 805, 885, 955) g. Required tools include a 6.5 mm (US K) crochet hook, a darning needle, embroidery scissors, and one stitch marker or safety pin.
Key abbreviations used in the pattern include Ch for Chain, Sl st for Slip Stitch, HDC for Half Double Crochet, BLO for Back Loop, St(s) for Stitch(es), Rep for Repeat, RS for Right Side, and WS for Wrong Side.
Back width measures 44(49, 54, 59, 64)(69, 74, 79, 84) cm, or 17.5(19.5, 21.5, 23.5, 25.5)(27.5, 29, 31, 33) inches. Body length ranges from 37(39, 41, 43, 45)(47, 49, 51, 53) cm, equivalent to 14.5(15.5, 16, 17, 18)(18.5, 19, 20, 21) inches.
Gauge is specified as 12 half double crochet stitches wide by 10 rows tall within a 10 cm (4 inch) square.
Row 3 consists of a chain 1, seven back loop only half double crochets, one half double crochet in the last stitch, and a turn. Rows 2 and 3 are repeated until row 99(111, 123, 135, 147)(159, 171, 183, 195). Ensure the chain remains loose and tall enough to align with the height of the back loop half double crochets. Do not fasten off, as the next step continues along the long edge of the ribbing.
Row 1 places one half double crochet in each ribbing row, resulting in 99(111, 123, 135, 147)(159, 171, 183, 195) stitches. Row 2 repeats this count across. Continue repeating row 2 until reaching row 14(14, 16, 16, 18)(18, 18, 20, 20).
Do not fasten off, because the work continues directly into the first front panel.
With the right side facing, insert the hook into the marked stitch, secure the yarn, and pull up a loop. Row 1 works 53(59, 65, 71, 77)(83, 89, 95, 101) half double crochet stitches, skips 1 stitch, and marks the next stitch. Row 2 repeats across with the same count. Continue repeating row 2 until row 18(20, 20, 22, 22)(24, 26, 26, 28), for a total of 32(34, 36, 38, 40)(42, 44, 46, 48) rows, then fasten off.
With the right side facing, insert the hook into the marked stitch, secure the yarn, and pull up a loop. Row 1 works half double crochet across, yielding 22(25, 28, 31, 34)(37, 40, 43, 46) stitches. Repeat row 1 until row 18(20, 20, 22, 22)(24, 26, 26, 28), for a total of 32(34, 36, 38, 40)(42, 44, 46, 48) rows, then fasten off.
Row 1 works half double crochet into the second chain from the hook and across, then turns. Row 2 is a chain 1, seven back loop only slip stitches, one slip stitch in the last stitch, and a turn. Row 3 is a chain 1, seven back loop only half double crochets, one half double crochet in the last stitch, and a turn.
Make two sleeves. Row 1 works half double crochet in the first row, half double crochet in the slip stitch row, then repeats 2HDC in the half double crochet row and half double crochet in the slip stitch row until the last row, giving 30(33, 36, 36, 39)(42, 45, 45, 48) stitches. Sizes XS(S, M, XL)(2XL, 3XL, 5XL) work row 2 as a repeat of 2HDC, HDC 2, ending with 40(44, 48, 52)(56, 60, 64).
Sizes (L, 4XL) work row 2 as 2HDC 3 followed by the same repeat, ending with (50, 62). All sizes then work row 3 as half double crochet across, giving 40(44, 48, 50, 52)(56, 60, 62, 64), and repeat row 3 until the sleeve measures 37(39, 39, 39, 41)(41, 41, 43, 43) cm or 14.5(15.5, 15.5, 15.5, 16)(16, 16, 17, 17) inches, approximately row 32(34, 34, 34, 36)(36, 36, 38, 38). Rows can be added or removed to change the sleeve length.
Fasten off, fold the sleeve in half lengthways, and whip stitch the long edge together.
Insert the hook into the corner of the front panel, secure the yarn, and pull up a loop. Row 1 is a chain 1, then slip stitch evenly along the edge of the neckline, then fasten off. The exact number of stitches does not matter; focus on spacing them evenly. If the neckline ruffles, you have too many stitches, and if it puckers, you have too few.
Row 1 works half double crochet into the second chain from the hook and across, then turns. Row 2 is a chain 1, seven back loop only slip stitches, one slip stitch in the last stitch, and a turn. Row 3 is a chain 1, seven back loop only half double crochets, one half double crochet in the last stitch, and a turn.
Pin the ribbing along the neckline and whip stitch it into place.
Row 2 skips the first 2 slip stitches, works seven back loop only slip stitches, one slip stitch in the last stitch, and turns.
Spacing is critical when working onto the raw edge of half double crochet rows. Slip stitches placed too close together cause ruffling, while those too far apart lead to puckering. Aligning the first slip stitch with the height of the back loop half double crochets, and placing the second slightly above, helps maintain evenness.
Generally, spacing four ribbing rows for every three half double crochet body panel rows helped the ribbing lie flat, but experiment with your own yarn and tension.
Construction
The cardigan consists of three main pieces: one body panel and two sleeves. Because the ribbing uses back loop stitches, both the body and sleeves begin with their hem or cuff ribbing, and the main fabric is crocheted onto the long edge of that ribbing. The body panel is worked entirely in one piece, which significantly reduces final seaming. Although the sample is cropped, you can create a hip-length or knee-length version by adding rows to the main body panel.
After completing the body panel, it is separated into three sections: two front panels and a back panel, forming openings for the sleeves. The oversized balloon sleeves are worked from the cuff up, utilizing only two rows of shaping. Once the body and sleeves are ready, the front panels are folded over the back, shoulder seams are sewn, and sleeve tops are whip stitched to the armholes. To minimize seaming further, the sleeves can be worked in the round.
Print and Crochet Offline!
For those who prefer working without a screen, a low-cost printable PDF version is available for purchase. This 17-page document includes a photo tutorial and separates images from text to save ink, making it practical for offline use.
3 Neckline Finishes
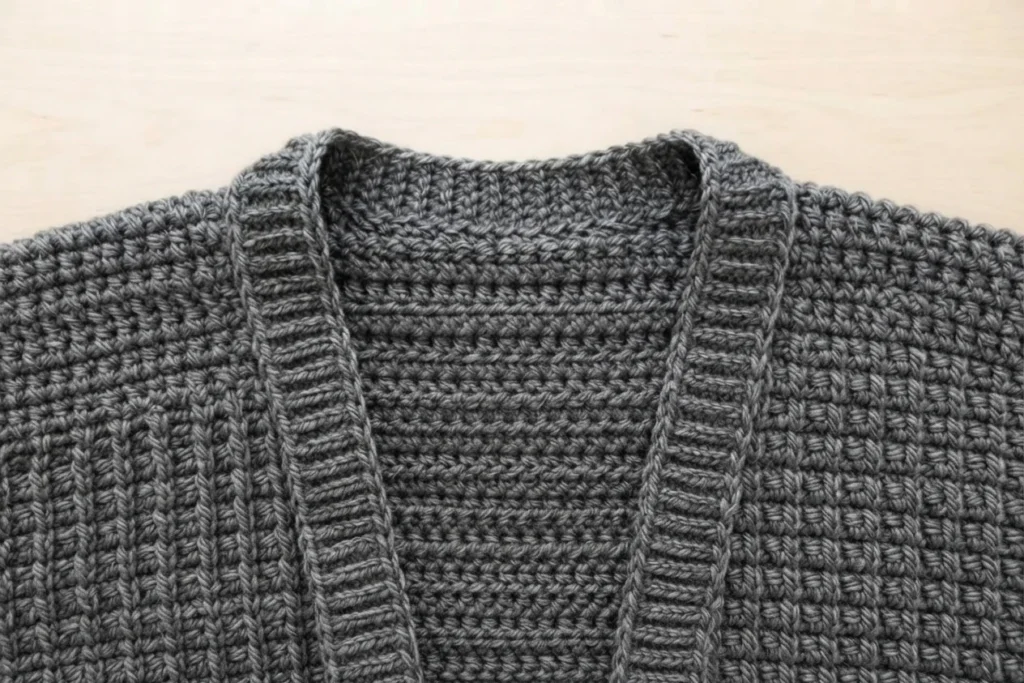
One of the most frequently asked questions about the Briar Cardigan was whether neckline ribbing could be added. The Doveport Cardigan answers that directly with instructions for three different neckline finishes, so you can pick the look and the amount of sewing that suits you.
1. Slip Stitch Edging
Slip stitch edging gives a very clean, minimalist finish and is the easiest of the three options, which makes it a strong choice for beginners. The key is even tension and even stitch spacing. If your stitches sit too far apart, the neckline will pucker; if you work too many stitches, the neckline will ruffle and refuse to lie flat. Work a chain 1, then slip stitch evenly along the edge of the neckline, and fasten off.
2. BLO HDC + BLO sl st Ribbing crocheted separately
If you prefer the look of thicker neckline ribbing, this option delivers it. You follow the same ribbing method used for the hem and sleeve cuffs, alternating half double crochet and slip stitch rows, until the strip measures the same length as the neckline. Then you pin it along the neckline and whip stitch it into place. The source describes this as the easiest and most forgiving ribbed option for beginners who want ribbing.
3. BLO HDC + BLO sl st crocheted onto the main body panel
Crocheting the ribbing directly onto the neckline avoids sewing, but it suits a more experienced crocheter who is comfortable adjusting gauge. The trick is matching your slip stitches to the height of the ribbing rows rather than to the rows along the body edge. A common mistake is assuming that one body panel row equals one ribbing row, which is often not the case because stitches and yarns have slightly different gauges. For this cardigan, spacing four ribbing rows along three body half double crochet rows worked well, but you will need to experiment with your own yarn and tension.
Crochet ribbing separately vs. worked in one piece
Gauge is the biggest reason the designer usually recommends making ribbing separately and sewing it on. With back loop ribbing, matching the ribbing gauge to the body stitches or rows can be tricky, so the final look can vary widely depending on crochet experience. Working the ribbing separately gives a more consistent result across different skill levels and yarns. Time is the second reason: adjusting gauge and tension on an assembled garment takes time, and the whole cardigan can become heavy and cumbersome to turn as you work.
Whip stitching separate neckline ribbing into place also gives a flat, seamless look. Either method is fine, so choose whichever you prefer.
Looking for more free crochet cardigan patterns?
If this project leaves you wanting more, the source points to three additional free crochet cardigan patterns: the Weekend Snuggle Sweater, the In The Clouds Cardigan, and the Briar Cardigan. Each is a separate free pattern on the designer’s site, so follow the links to see the construction and sizing for yourself.
Yarn
The Doveport Cardigan uses Lion Brand Heartland, a 100% acrylic yarn with a smooth, silky sheen. Heartland comes in a good variety of colorways, more than 30 different shades, and its heathered strands mix similar tones in a few different shades. That blend adds dimension and interest to a garment compared with solid colors. One thing to note: Heartland sits on the thicker end of a worsted, aran, medium (4) yarn. If you substitute, pick a thicker aran yarn so you can match the pattern gauge more easily.
Video Tutorial
A step-by-step video tutorial accompanies the free written pattern, which is helpful for a beginner-plus project like this one. The cardigan is worked flat using half double crochets and slip stitches, with the body in one piece and the sleeves sewn on. The pattern uses US crochet terms, and the sizing guide follows XS(S, M, L, XL)(2XL, 3XL, 4XL, 5XL). Where a single number appears, it applies to every size; where multiple numbers appear, they follow that size order.
Total stitch counts are shown between angle brackets, and the turning chain of 1 does not count as a stitch.
The sample is a size small shown on a 5’3 inch model with a 32 inch bust. The body panel and sleeves are crocheted from the bottom up, with the ribbing worked lengthways and the main fabric crocheted onto its long edge. To adjust length, simply add or remove rows; for every 2 cm (0.75 in) of added length you will need approximately 12(12, 14, 16, 18)(18, 20, 20, 22) g more yarn. All pieces are sewn together with the right side on the inside and the wrong side facing out.
The sample yarn is classified as aran, worsted, medium (4), and the source suggests a substitute with a recommended hook size of 6 mm (J) or 6.5 mm (K).
Materials
The materials list is short and beginner friendly. You need Lion Brand Heartland in aran, worsted, medium (4), listed as 230 m/142 g and 251 yds/5 oz, 100% acrylic, in the colorway Petrified Forest, with approximate quantities of 415(485, 545, 595, 670)(735, 805, 885, 955) g. Also gather a 6.5 mm (US K) crochet hook, a darning needle, embroidery scissors, and one stitch marker or safety pin.
Stitches & Abbreviations
The pattern uses a compact set of abbreviations: Ch = Chain, Sl st = Slip Stitch, HDC = Half Double Crochet, BLO = Back Loop, St(s) = Stitch(es), Rep = Repeat, RS = Right Side, and WS = Wrong Side.
Measurements
Measurements are given for nine sizes in both centimeters and inches. To fit bust in cm: 71(81, 91, 101, 112)(122, 132, 142, 152); in inches: 28(32, 36, 40, 44)(48, 52, 56, 60). Back width in cm: 44(49, 54, 59, 64)(69, 74, 79, 84); in inches: 17.5(19.5, 21.5, 23.5, 25.5)(27.5, 29, 31, 33). Body length in cm: 37(39, 41, 43, 45)(47, 49, 51, 53); in inches: 14.5(15.5, 16, 17, 18)(18.5, 19, 20, 21).
Armhole in cm: 17(18, 19, 20, 21)(23, 24, 25, 26); in inches: 6.5(7, 7.5, 8, 8.5)(9, 9.5, 10, 10.5). Sleeve length in cm: 37(39, 39, 39, 41)(41, 41, 43, 43); in inches: 14.5(15.5, 15.5, 15.5, 16)(16, 16, 17, 17). Gauge is 12 half double crochet stitches wide by 10 rows tall in a 10 cm/4 inch square.
Doveport Cardigan Crochet Pattern
Body Hemline Ribbing
The hemline ribbing runs along the bottom of the two front panels plus the back panel. It starts with a foundation chain of 9. Row 1 works half double crochet into the second chain from the hook and across, then turns. Row 2 is a chain 1, then back loop only slip stitch 7, a slip stitch in the last stitch, and a turn.
Row 3 is a chain 1, then back loop only half double crochet 7, a half double crochet in the last stitch, and a turn. Rows 2 and 3 repeat until row 99(111, 123, 135, 147)(159, 171, 183, 195). Keep the chain loose and tall enough to match the height of the back loop half double crochets, and do not fasten off, because the next step works along the long edge of the ribbing.
Main Body Panel
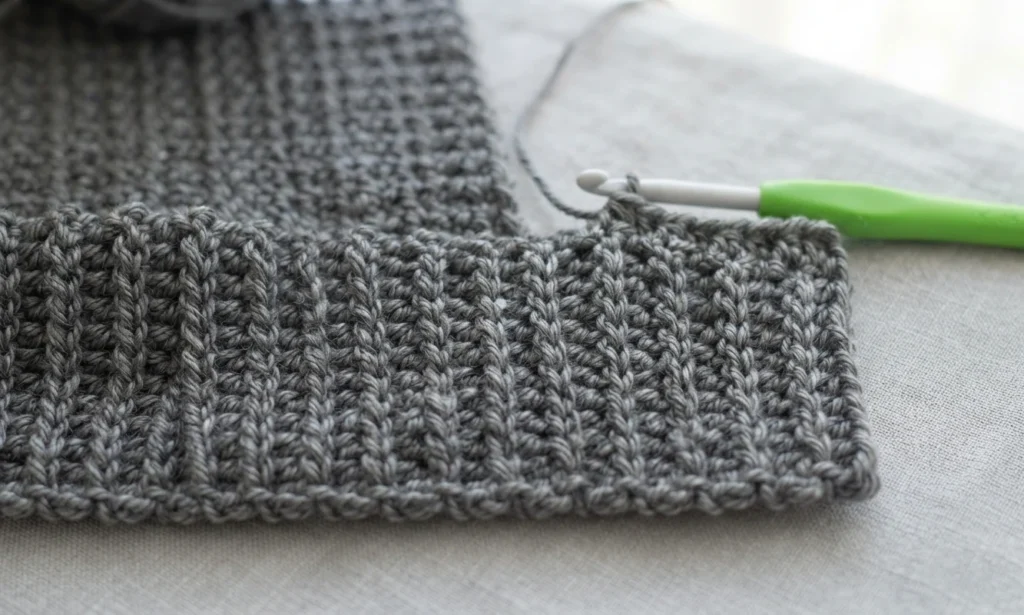
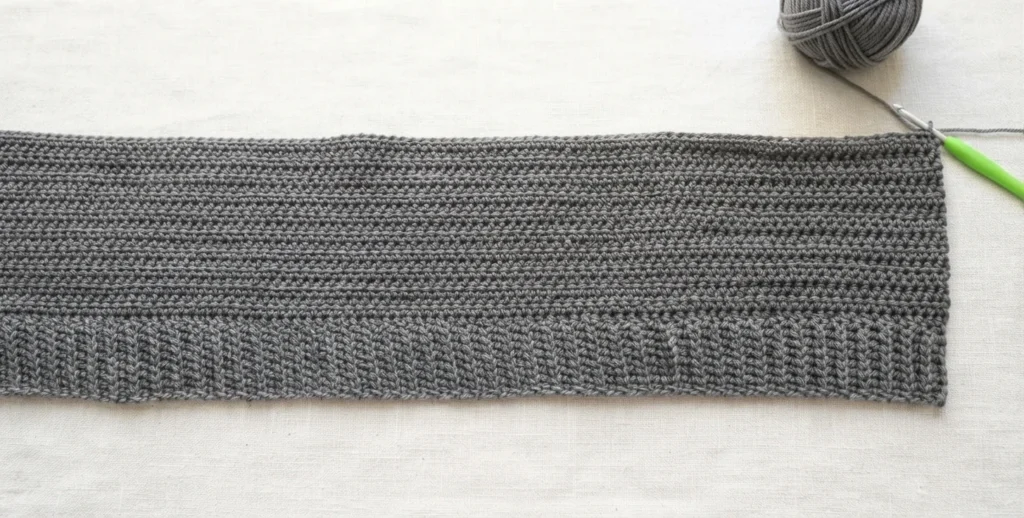
The main body is worked in half double crochet across the hem ribbing. Row 1 places one half double crochet in each ribbing row, giving 99(111, 123, 135, 147)(159, 171, 183, 195) stitches, and row 2 repeats across with the same count. Repeat row 2 until row 14(14, 16, 16, 18)(18, 18, 20, 20).
You can add or remove rows here to make the cardigan longer or shorter, but keep in mind that the front and back panel shaping adds approximately 18(20, 20, 22, 24)(24, 26, 26, 28) cm, or 7(8, 8, 8.5, 9.5)(9.5, 10, 10, 11) inches, to the current length. Do not fasten off, because the work continues into the first front panel.
First Front Panel
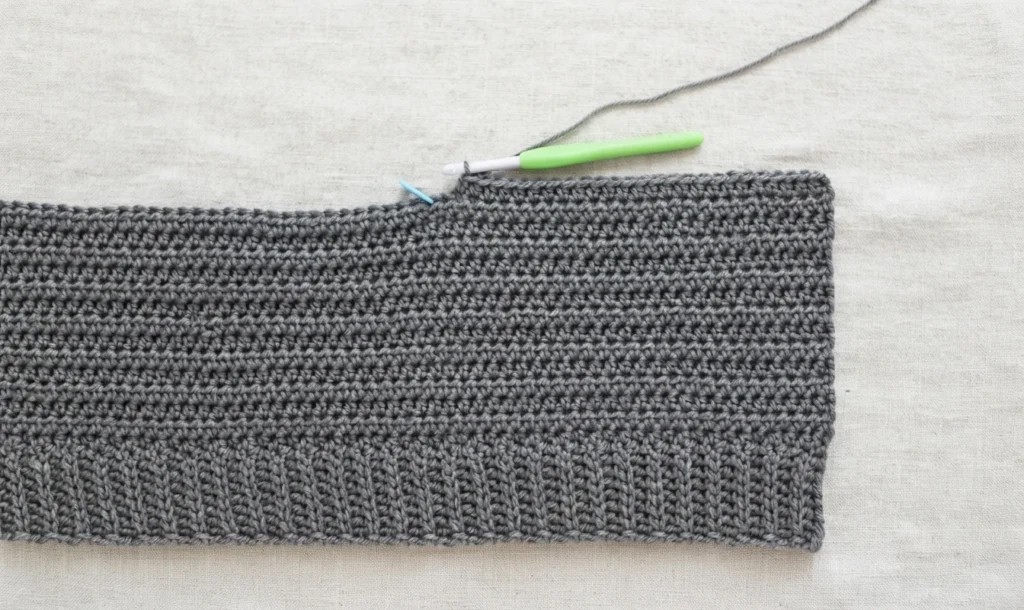
The first front panel is worked from the main body in half double crochet. Row 1 works 22(25, 28, 31, 34)(37, 40, 43, 46) stitches, skips 1 stitch, and places a stitch marker in the next stitch. Row 2 repeats across with the same stitch count. Continue repeating row 2 until row 18(20, 20, 22, 22)(24, 26, 26, 28), for a total of 32(34, 36, 38, 40)(42, 44, 46, 48) rows, then fasten off.
Back Panel


With the right side facing, insert the hook into the stitch holding the marker, secure the yarn, and pull up a loop. Row 1 works 53(59, 65, 71, 77)(83, 89, 95, 101) half double crochet stitches, skips 1 stitch, and marks the next stitch. Row 2 repeats across with the same count. Repeat row 2 until row 18(20, 20, 22, 22)(24, 26, 26, 28), for a total of 32(34, 36, 38, 40)(42, 44, 46, 48) rows, then fasten off.
Second Front Panel

With the right side facing, insert the hook into the marked stitch, secure the yarn, and pull up a loop. Row 1 works half double crochet across, giving 22(25, 28, 31, 34)(37, 40, 43, 46) stitches. Repeat row 1 until row 18(20, 20, 22, 22)(24, 26, 26, 28), for a total of 32(34, 36, 38, 40)(42, 44, 46, 48) rows, then fasten off.
Sleeve Ribbing

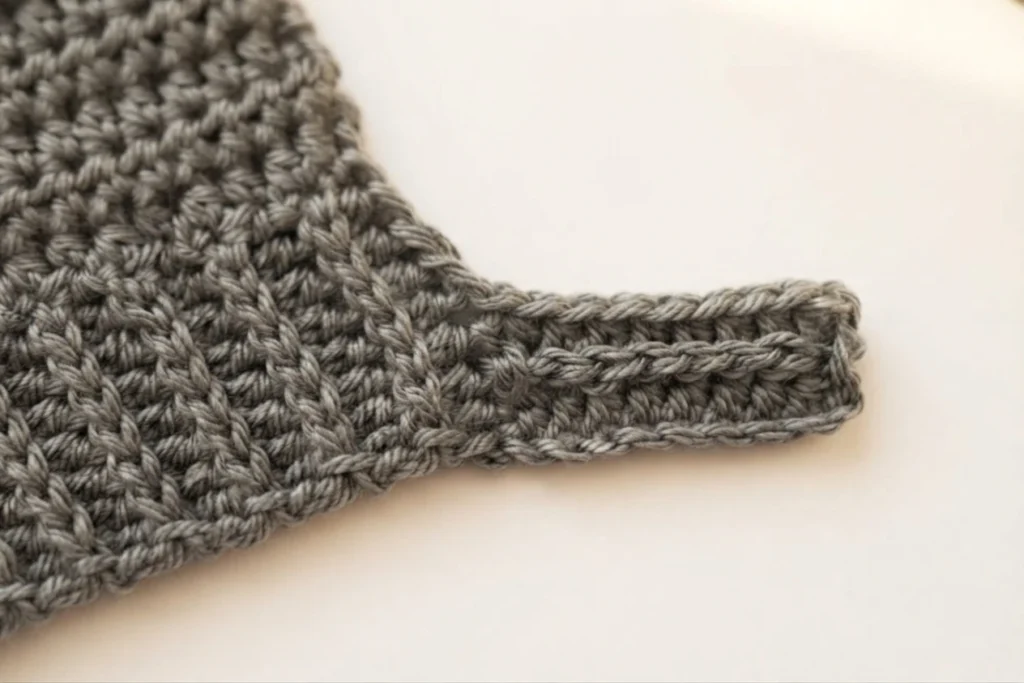
The sleeve ribbing is a narrow strip worked the same way as the hem ribbing. Start with a foundation chain of 9. Row 1 works half double crochet into the second chain from the hook and across, then turns. Row 2 is a chain 1, back loop only slip stitch 7, a slip stitch in the last stitch, and a turn. Row 3 is a chain 1, back loop only half double crochet 7, a half double crochet in the last stitch, and a turn.
Repeat rows 2 and 3 until row 21(23, 25, 25, 27)(29, 31, 31, 33), then continue along the long edge without fastening off.
Sleeves

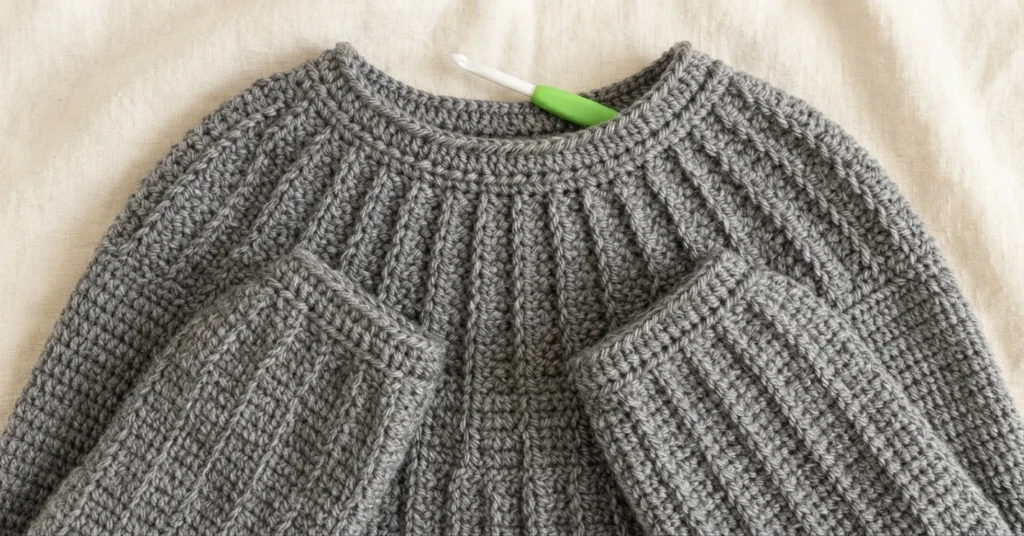
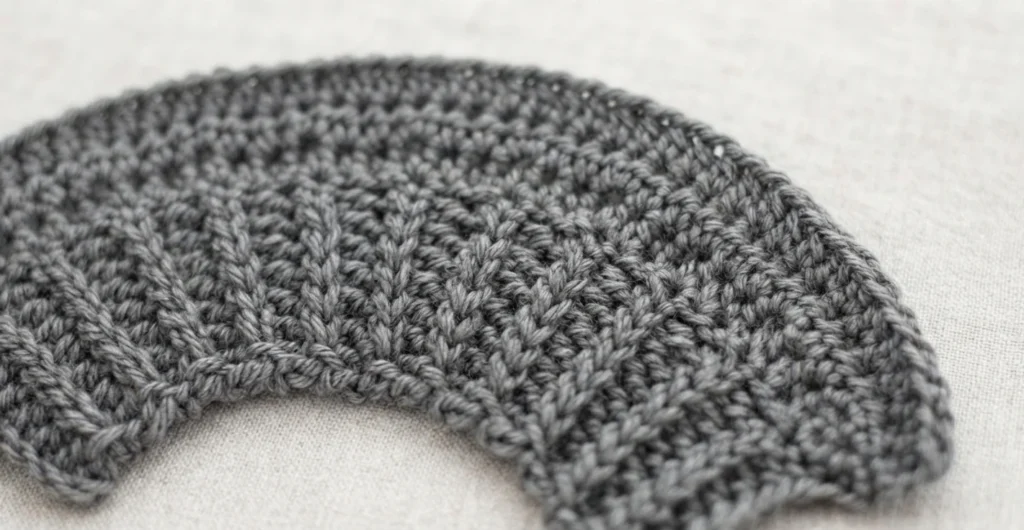
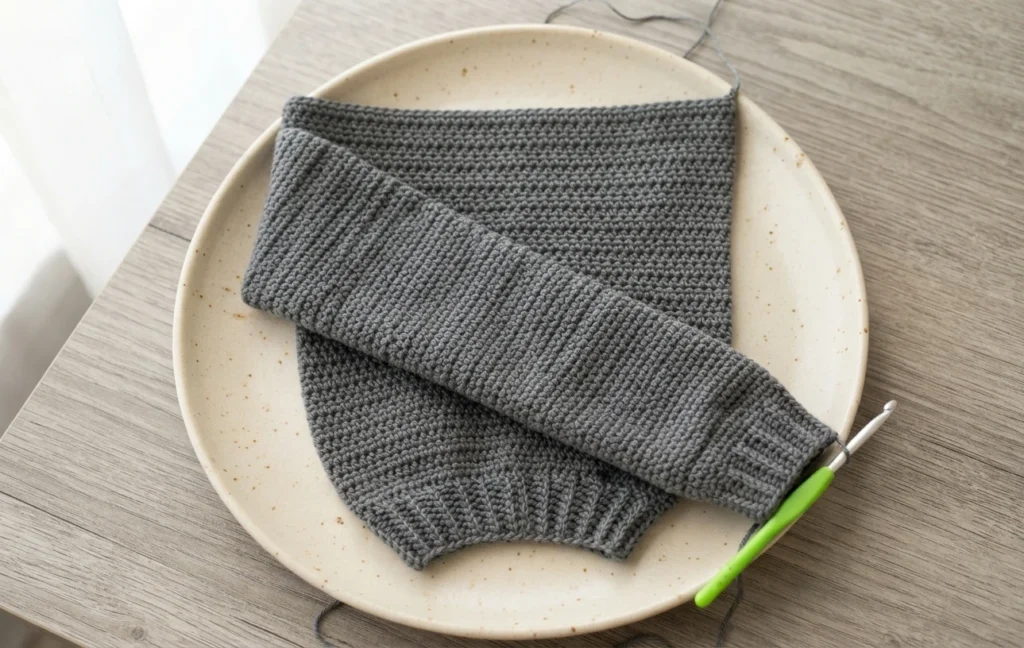
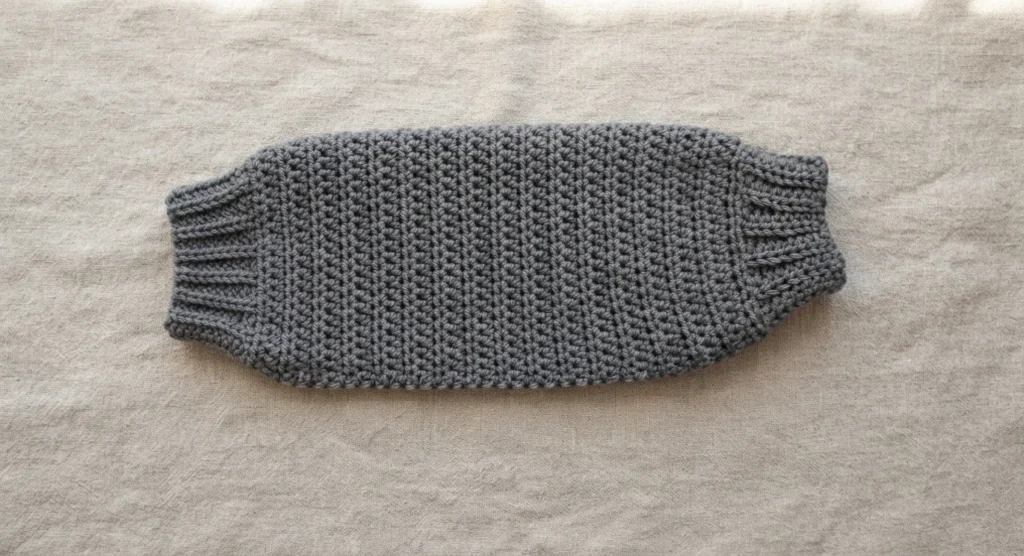
Make two sleeves. Row 1 works half double crochet in the first row, half double crochet in the slip stitch row, then repeats 2HDC in the half double crochet row and half double crochet in the slip stitch row until the last row, giving 30(33, 36, 36, 39)(42, 45, 45, 48) stitches. Sizes XS(S, M, XL)(2XL, 3XL, 5XL) work row 2 as a repeat of 2HDC, HDC 2, ending with 40(44, 48, 52)(56, 60, 64).
Sizes (L, 4XL) work row 2 as 2HDC 3 followed by the same repeat, ending with (50, 62). All sizes then work row 3 as half double crochet across, giving 40(44, 48, 50, 52)(56, 60, 62, 64), and repeat row 3 until the sleeve measures 37(39, 39, 39, 41)(41, 41, 43, 43) cm or 14.5(15.5, 15.5, 15.5, 16)(16, 16, 17, 17) inches, approximately row 32(34, 34, 34, 36)(36, 36, 38, 38). Rows can be added or removed to change the sleeve length.
Fasten off, fold the sleeve in half lengthways, and whip stitch the long edge together.
Assembly

Fold the front panels on top of the back panel and whip stitch the shoulder seams together. Then whip stitch the tops of the sleeves to the armholes. At this point you can finish the neckline with a simple edging, with matching ribbing crocheted separately, or with ribbing crocheted directly onto the neckline.
Neckline Edging

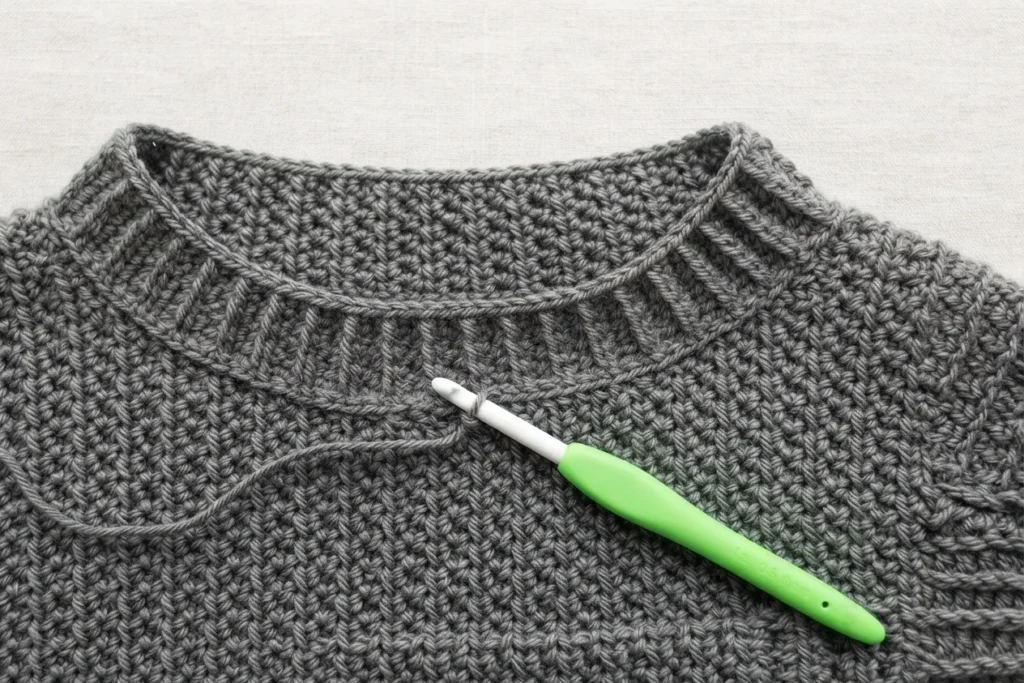
This beginner-friendly edging starts with the right side facing. Insert the hook into the corner of the front panel, secure the yarn, and pull up a loop. Row 1 is a chain 1, then slip stitch evenly along the edge of the neckline, then fasten off. The exact number of stitches does not matter; focus on spacing them evenly. If the neckline ruffles, you have too many stitches, and if it puckers, you have too few.
Neckline Ribbing - Crocheted Separately

This beginner-friendly ribbing starts with a foundation chain of 9. Row 1 works half double crochet into the second chain from the hook and across, then turns. Row 2 is a chain 1, back loop only slip stitch 7, a slip stitch in the last stitch, and a turn. Row 3 is a chain 1, back loop only half double crochet 7, a half double crochet in the last stitch, and a turn.
Repeat rows 2 and 3 until the ribbing measures the length of the entire neckline, then fasten off. Pin the ribbing along the neckline and whip stitch it into place.
Neckline Ribbing - Crocheted onto Neckline
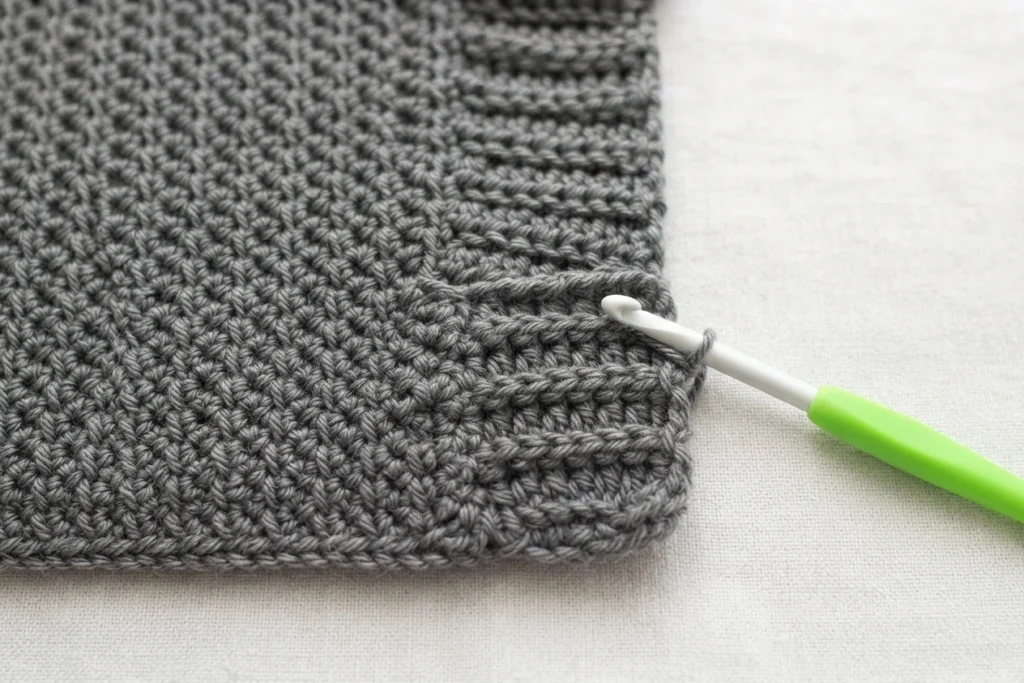
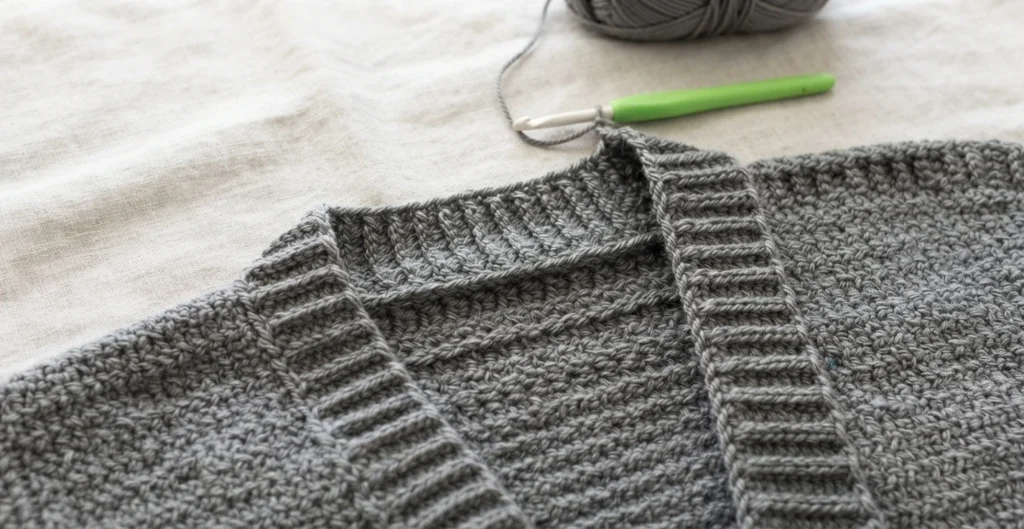


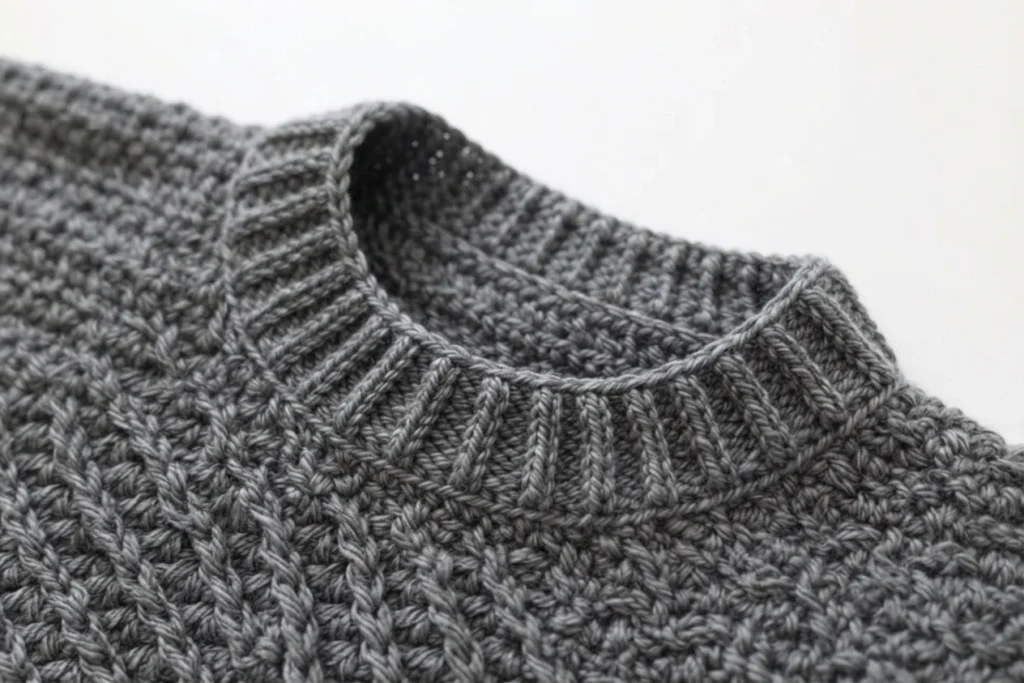
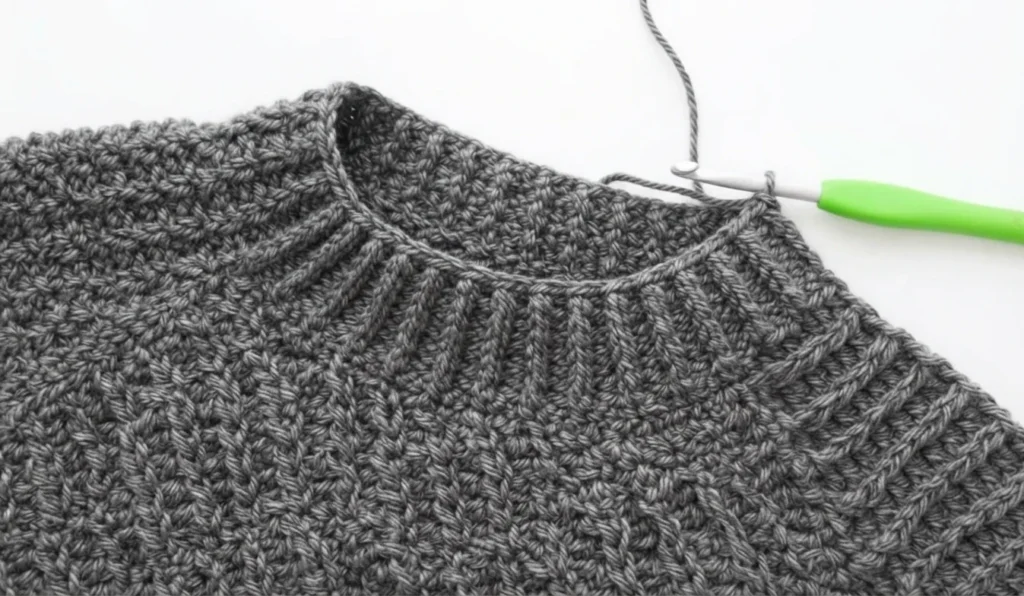

With the right side facing, insert the hook into the corner of the front panel, secure the yarn, and pull up a loop. Start with a foundation chain of 9. Row 1 works half double crochet in the second chain from the hook, half double crochet 7, then slip stitch into the next 2 stitches on the neckline edge, and turns. Row 2 skips the first 2 slip stitches, works back loop only slip stitch 7, a slip stitch in the last stitch, and turns.
Row 3 is a chain 1, back loop only half double crochet 8, slip stitch into the next 2 stitches on the neckline edge, and a turn. Repeat rows 2 and 3 until you reach the opposite corner of the second front panel, end on a repeat of row 3, place 1 slip stitch in the corner, and fasten off.
Spacing matters when working onto the raw edge of the half double crochet rows. If your slip stitches sit too close together, the neckline will ruffle; if they sit too far apart, the ribbing will pucker and pull. Lining up the first slip stitch at the same height as the back loop half double crochets, with the second slip stitch slightly above it, helps even things out. In general, spacing four ribbing rows for every three half double crochet body panel rows helped the ribbing lie flat, but experiment with your own yarn and tension.
Finishing
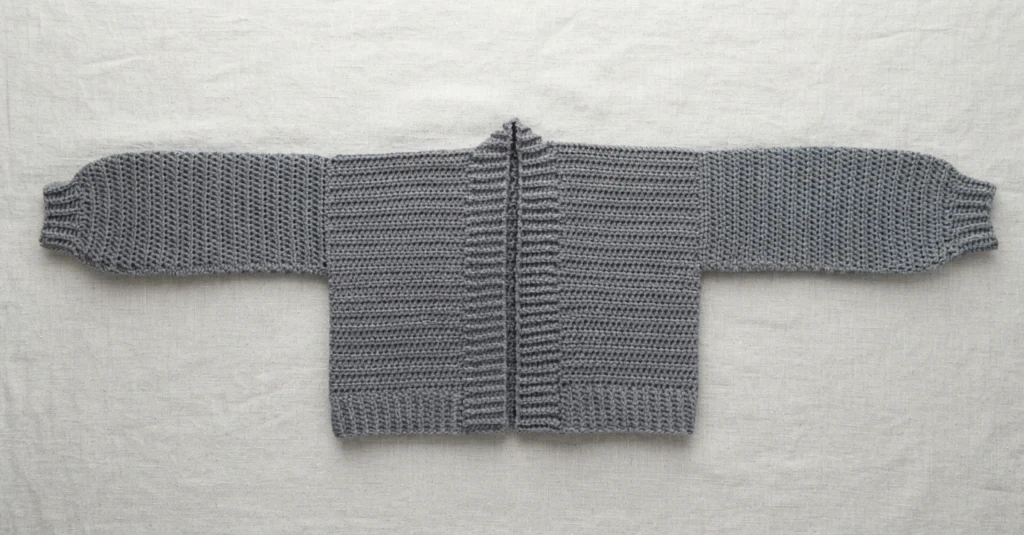
Weave in all of your ends and steam block to measurements. That completes the Doveport Cardigan. If you would like another leafy project to try next, see this Crochet Maple Leaf Pattern & Video: Pattern Overview.
- Crochet Cardigan Patterns
- Fall Crochet Patterns
- Easy Crochet Projects