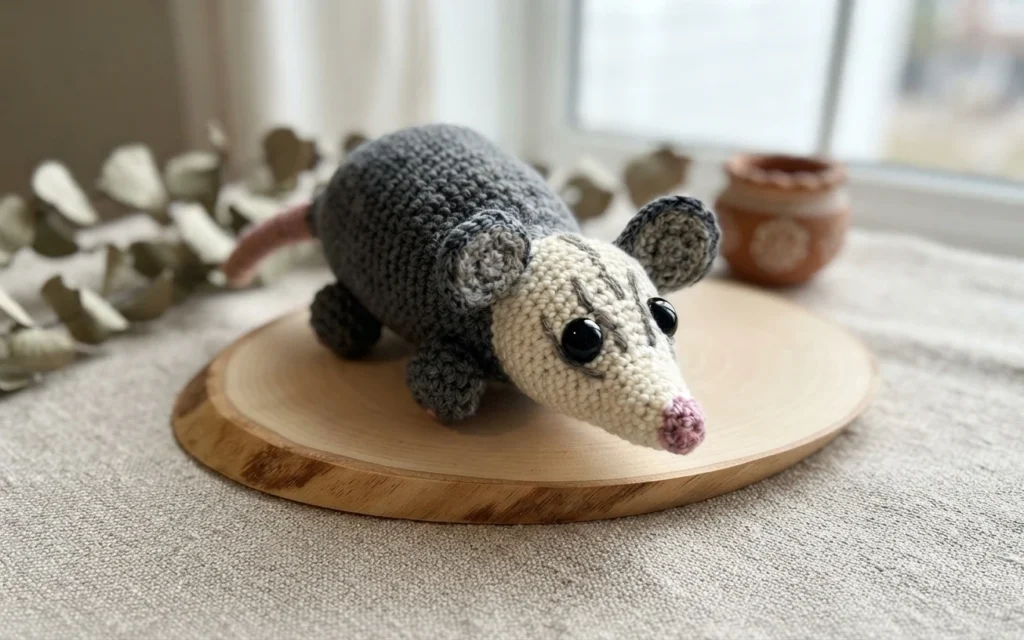
This is a construction overview, not a complete crochet tutorial. Lucy Kate Crochet created the design and provides the full crochet opossum pattern and instructions online. The project is described as beginner friendly, with aran-weight yarn, a 5 mm hook, a few color changes, and hand-sewn markings. The head and body are crocheted as one piece; the ears, legs, and tail are made separately.
Project introduction
The design uses color changes in the head and body, with sewn details helping create its distinctive markings. The yarn is described as fairly thick and soft, contributing to a fluffy-looking finish. If you are new to crochet, the source suggests reviewing basic techniques before starting.
Crochet Equipment List
The quantities below are the amounts listed for this project. Another aran-weight yarn is acceptable if the named brand is unavailable. Stitch markers are optional, and yarn scraps can serve as simple place markers.
- 50 g Knit Craft Leader of the Pac aran yarn in cream
- 50 g Knit Craft Leader of the Pac aran yarn in charcoal
- 5 g Knit Craft Leader of the Pac aran yarn in pink
- 10 g Knit Craft Leader of the Pac aran yarn in mink
- 5 mm crochet hook
- Two safety eyes
- Toy-safe stuffing
- Yarn needle
- Optional stitch markers, or scraps of yarn to mark your place
The materials list names cream, while the head and body directions call for a change to white yarn. Check the designer’s page for the intended color rather than assuming these labels refer to the same shade.
Pattern notes
The yarn gives the toy an almost fluffy texture, but its surface can make stitch positions harder to see in the round. The designer notes that recognizing the stitches becomes easier with practice and describes the yarn as running smoothly through the fingers. The separate pieces begin with magic rings. Crochet terms are explained when first used, and the source also points to a reference for common abbreviations.
Free Crochet Opossum Pattern Overview
The construction divides into a single head-and-body piece and separate legs, ears, and tail. The individual parts are hand-sewn together. The ears have two layers, with the smaller inner piece attached to the outer one.
Crochet Opossum Head and Body
The head-and-body piece starts in pink with a 5 mm hook, changes to white, and later changes to charcoal. The round headings below map the shaping and stitch-count progression without replacing the designer’s full directions.
Round 1
The starting magic ring is listed with six stitches, establishing the small beginning of the face.
Round 2
The six-stitch round continues with single crochet, followed by the stated change from pink to white.
Round 3 - 4
Both rounds remain at six stitches, keeping the small starting section even after the color change.
Round 5
The round increases by placing two single crochets in each stitch of the previous round.
Round 6 - 9
These four rounds maintain an even stitch count, forming an even section before shaping resumes.
Round 10
The count rises to 15. The listed sequence places increases at intervals before continuing with single crochet across the remaining stitches.
Round 11
This is an even round of 15 single crochets, with no change to the stated stitch total.
Round 12
Three spaced increases raise the count, followed by single crochet across the remainder of the round.
Round 13
The stitch count is maintained for this round.
Round 14
The round increases to 21 stitches through three spaced increases, with single crochet worked between them and across the remaining stitches.
Round 15
The stitch total rises through another increase round. The listed repeat spaces the increases farther apart than in the previous round.
Round 16
Three additional increases expand the round.
Round 17 - 18
Each round maintains the head shape before the next increase.
Round 19
The final stated head increase expands the head. The instructions place safety eyes at the front of the face and suggest setting the head on a flat surface to judge the forehead slope.
Round 20 - 21
These rounds maintain the stitch count, with a change to charcoal noted after the single-crochet round.
Round 22 - 23
The stitch count continues through both rounds, extending the section in charcoal.
Round 24
The sequence begins decreasing the piece, reducing the stated total.
Round 25
Another decrease round reduces the count.
Round 26
The direction changes back to increases, and the listed round grows.
Round 27
Spaced increases raise the count.
Round 28
A further increase round expands the piece, beginning the longer body section.
Round 29 - 43
These rounds each keep the same stitch count, creating the extended body portion without a change in the stated count.
Round 44
The shaping resumes with an increase.
Round 45
The next increase round expands the piece further.
Round 46
The total remains even for one round before the closing sequence.
Round 47
Decreases begin, reducing the stated count.
Round 48
The closing shape narrows.
Round 49
The next round is a decrease round.
Round 50
The total drops. The following round is where the source places the stuffing step.
Round 51
The count falls before stuffing. The source suggests using the end of the crochet hook to push stuffing toward the head end if needed.
Round 52
The listed decrease sequence reduces the stated total.
Round 53
The source closes the head-and-body piece with single-crochet decreases.
Crochet Opossum Ears
Each ear is assembled from an outer charcoal piece and a smaller mink inner piece. After crocheting both layers, sew them together with the inner detail positioned off-center; the completed ears are attached during final assembly.
Outer ear
The outer ear uses charcoal yarn and a 5 mm hook. It is worked in three rounds and finished with a long yarn tail for sewing.
Round 1
The outer-ear piece begins with a magic ring of eight stitches.
Round 2
The round doubles the listed stitch total.
Round 3
The final outer-ear round expands the piece. The source then calls for a slip stitch, fastening off, and a long sewing tail.
Inner ear
The smaller inner layer is made in mink yarn with the same 5 mm hook.
Round 1
Start the inner piece with a magic ring of eight stitches.
Round 2
The inner ear grows, then is fastened off with a long tail for sewing.
Sewing the ears together
Place the smaller piece over the larger one and align their narrow points so the inner layer sits off-center. Use a yarn needle to pass through both layers, secure the thread, and tuck the loose end back inside the ear.
Crochet Opossum Legs
The four legs are identical and use charcoal yarn with a 5 mm hook. The source describes stuffing each leg through Round 7, flattening its upper rounds, and sewing across that flattened edge when attaching it to the body.
Round 1
Each leg starts with a magic ring of eight stitches.
Round 2
The listed increase round expands the leg.
Round 3 - 5
Each of these rounds maintains the same stitch count.
Round 6
The round is listed with four decreases followed by eight single crochets.
Round 7
The source lists two single crochets, one single-crochet decrease, and nine further single crochets; check the designer’s page for the stated total.
Round 8 - 10
The last three rounds keep the same stitch count. The source says to stuff through Round 7, flatten the upper rounds, then sew across them when attaching the leg.
How To Crochet The Opossum’s Tail
The tail uses mink yarn and a 5 mm hook, and its construction does not use standard rounds. The source describes starting with a chain of 21, working single crochet along it while skipping the first chain space, then turning and working back toward the adjacent chain space on the original chain. It also offers sewing the tail together with a yarn needle in the same manner as an alternative.
Sewing Your Amigurumi Opossum Together
Before assembly, lay out the head and body, four legs, tail, and already joined ears. The suggested order is ears, legs, then tail. Use the eyes as a guide when positioning the ears, and arrange the legs symmetrically.
- Sew about a quarter of each ear edge to the head, using the yarn needle and the thread tail.
- Attach each leg by stitching through its flattened end and the body.
- Secure the tail at the back, which the source says may require only a simple knot.
- Draw loose yarn ends back into the toy.
My Crocheted Opossum
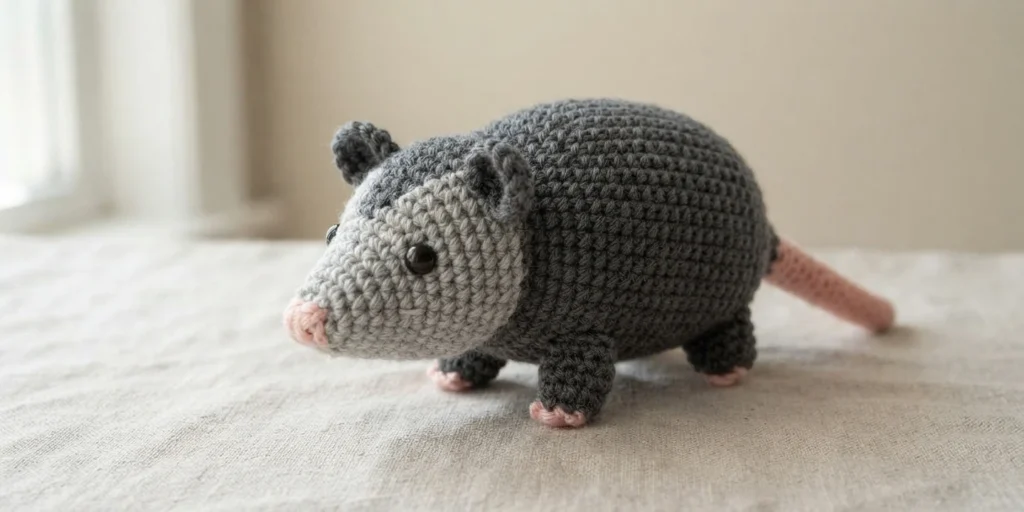
Lucy Kate explains that the idea came while reading about the distinction between an opossum and a possum. She wanted to see whether she could crochet a version that captured the animal’s appeal, and says the finished toy won over her son. For another project overview, see Crochet Gary the Snail Opossum: Pattern Overview.