Project introduction
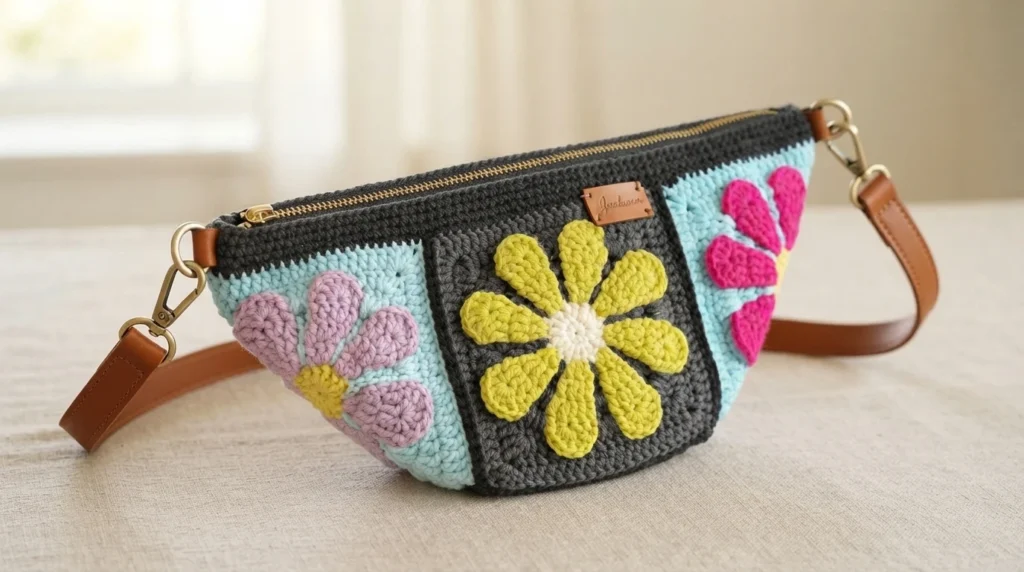
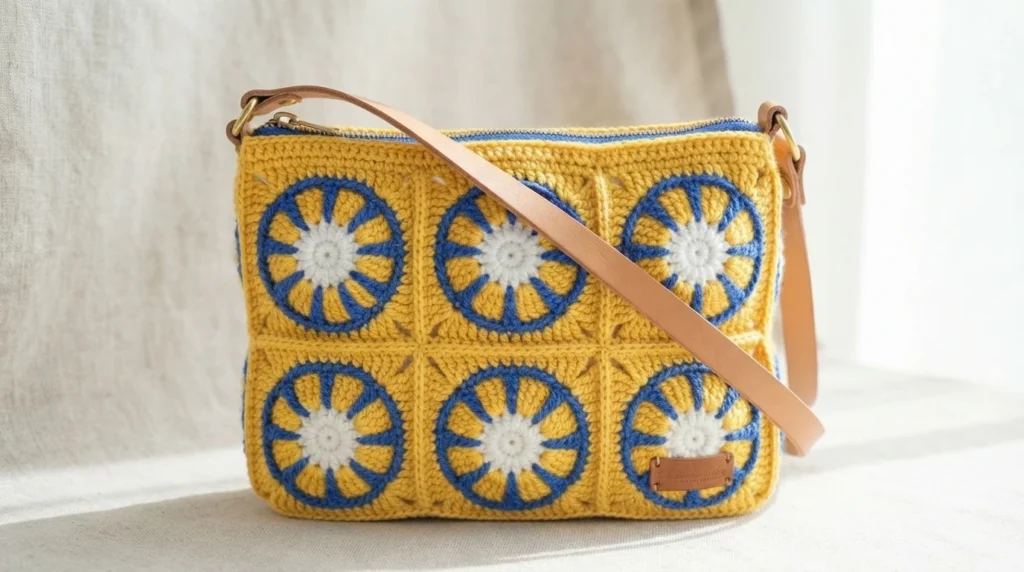
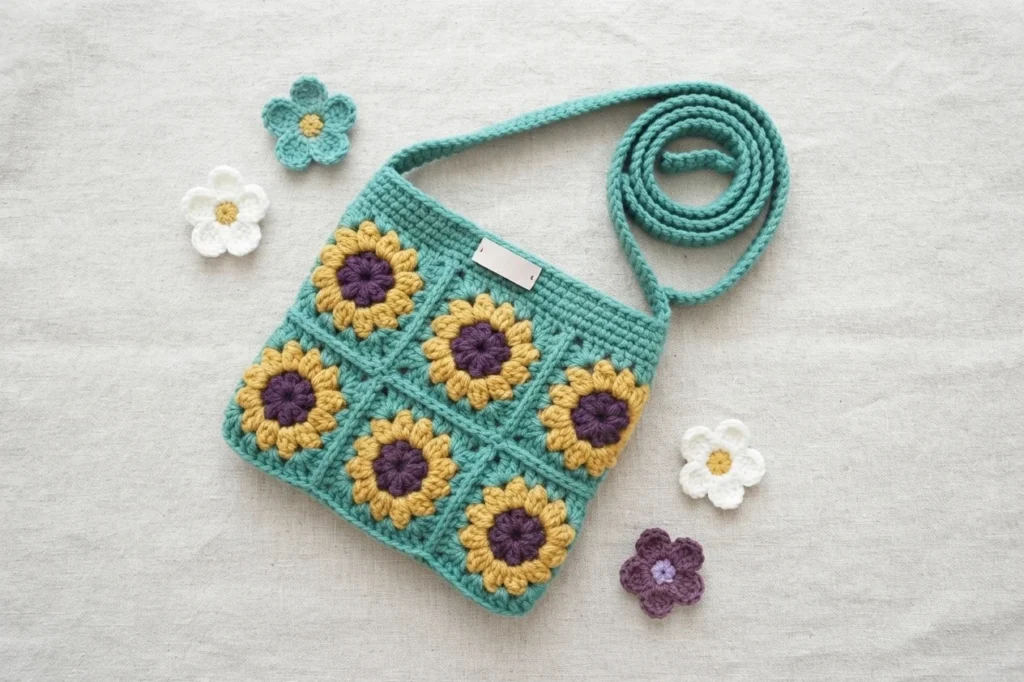
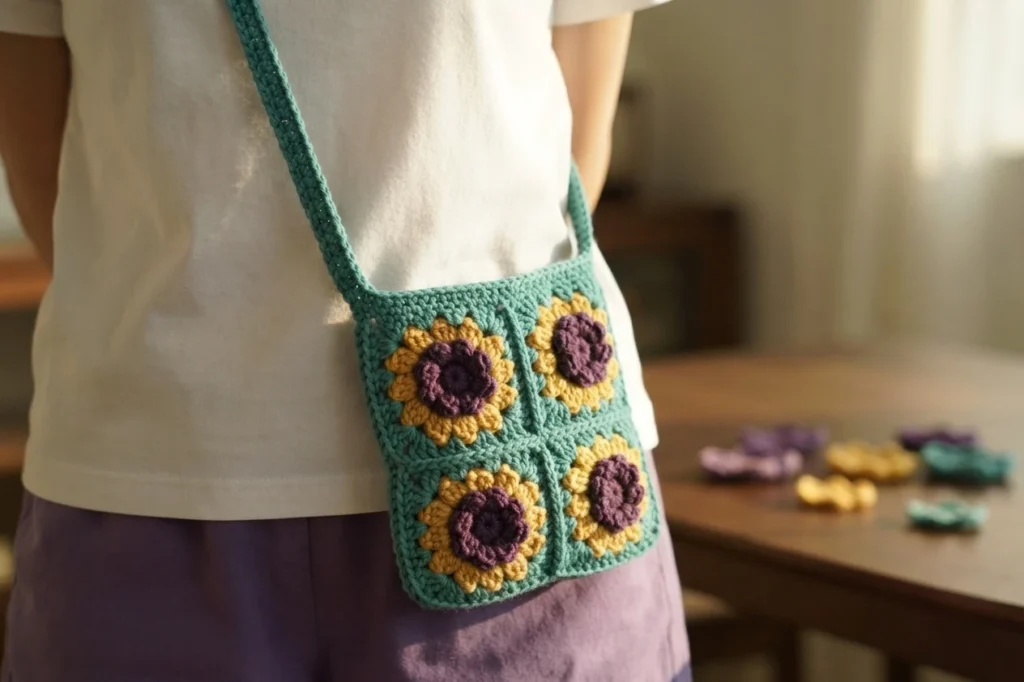
This project is a crocheted crossbody bag built from classic granny squares, mixing vintage charm with a modern everyday look. This overview gathers the design details, materials and assembly steps in one place, so you can see the whole finished accessory before you pick up your hook.
Crochet Granny Square Crossbody Bag ( Pattern Overview)
Please note: this is a pattern overview, not a full tutorial. It summarizes the project, materials and construction. For complete instructions with photos, see the Original designer’s pattern and instructions.
The project is a granny square crossbody bag mixing vintage charm with a modern look, presented as a free pattern for seasoned crocheters and beginners.
Pin for Later
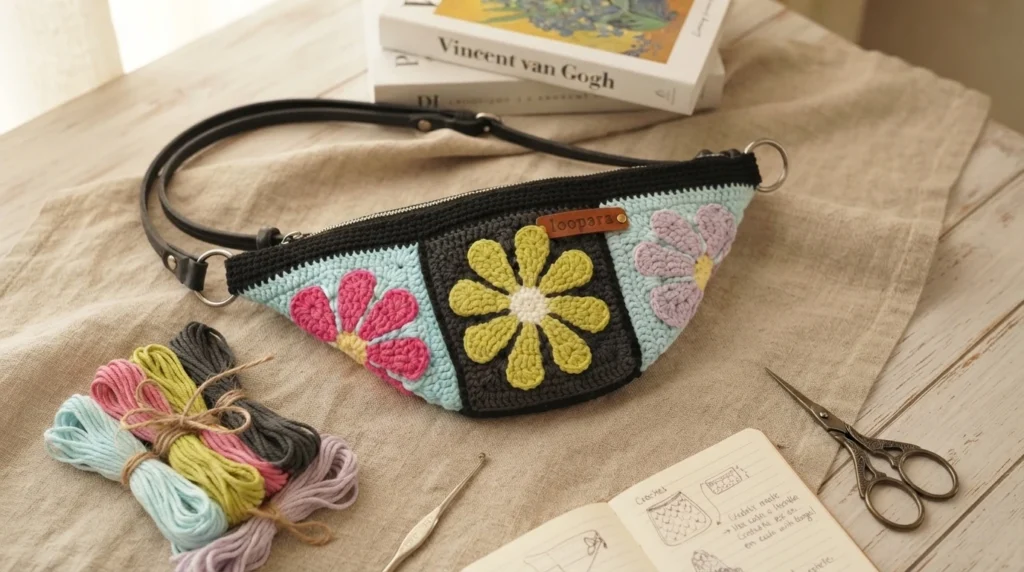
Save this vintage-inspired granny square bag tutorial for your next crochet adventure! Keep it bookmarked while you plan your color palette, then come back when you are ready to start your squares.
Details About Granny Square Crossbody Bag
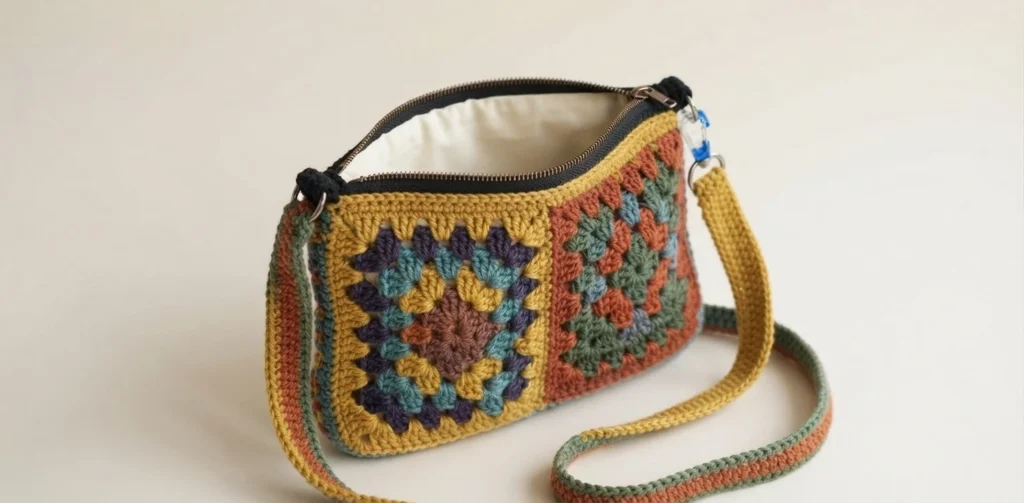
The bag is built from four classic granny squares. Each square measures 4.3 inches, and the finished crossbody measures 5.5 inches in height and 12.5 inches in width.
- Four 4.3-inch granny squares
- Finished: 5.5 inches high by 12.5 inches wide
- Main color for borders and joining; 2 to 3 complementary colors for inner rounds
- Black or beige with jewel tones, or soft pastels
Experiment with color combinations; granny squares suit nearly any palette.
Materials needed for Granny Square Crossbody Bag
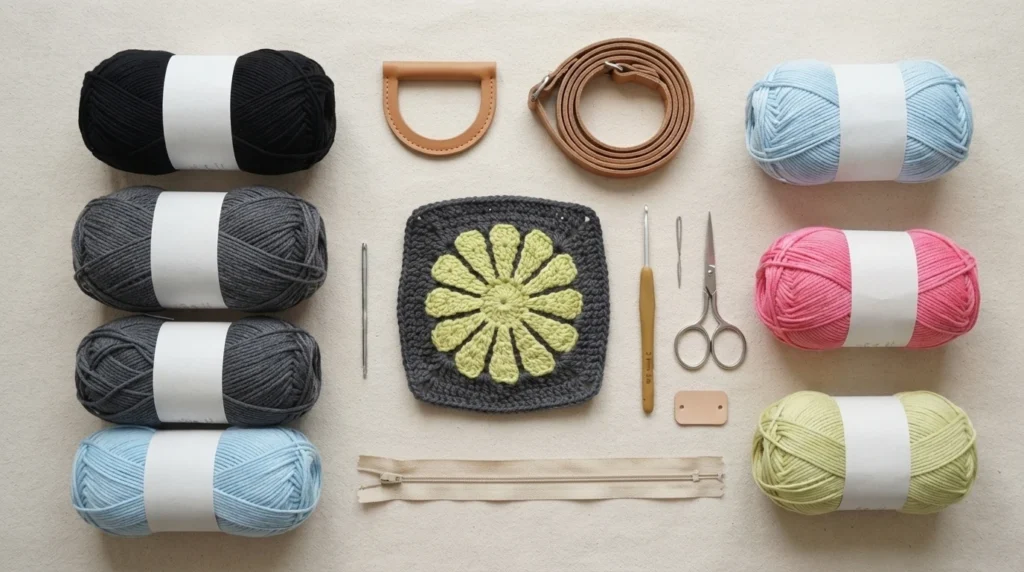
You will need:
- Yarn: Loopara 5ply combed cotton
- Hook: 3.0mm
- Scissors
- Yarn needle
- Stitch marker
- Leather label
- Zipper
- D-shaped buckle
- Leather bag strap
Abbreviations (US Terms)
The rounds and assembly notes use US crochet terms. Keep this quick reference nearby while you work:
| Magic ring | magic ring |
| ch | chain |
| sl | slip stitch |
| sc | single crochet |
| dc | double crochet |
| hdc | half double crochet |
| dc inc | double crochet increase |
You will meet dc inc most often in the motif rounds and in the (double crochet increase, chain 2, double crochet increase) corners that square off the outer edge.
How to Crochet Granny Square Crossbody Bag - Step by Step
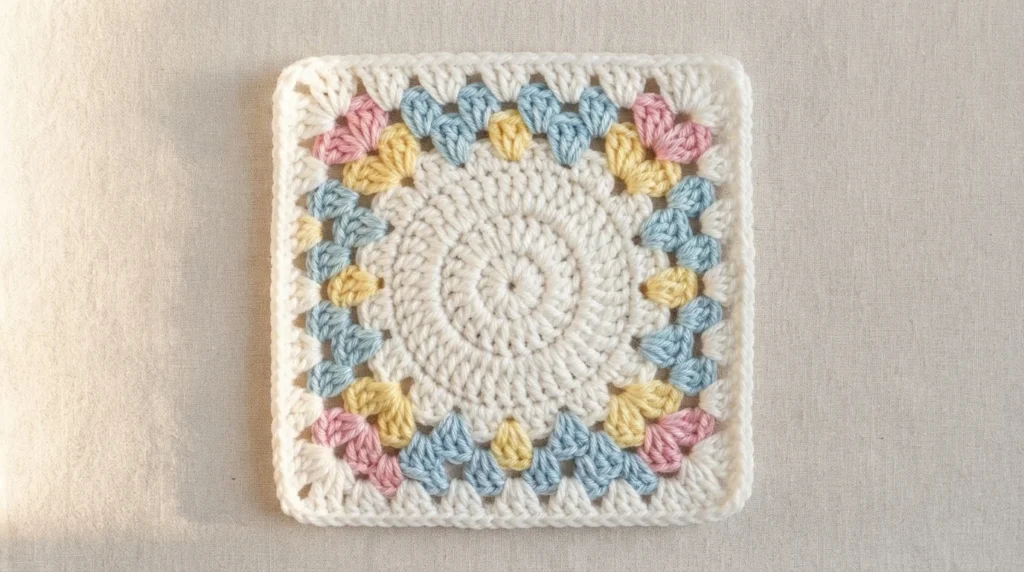
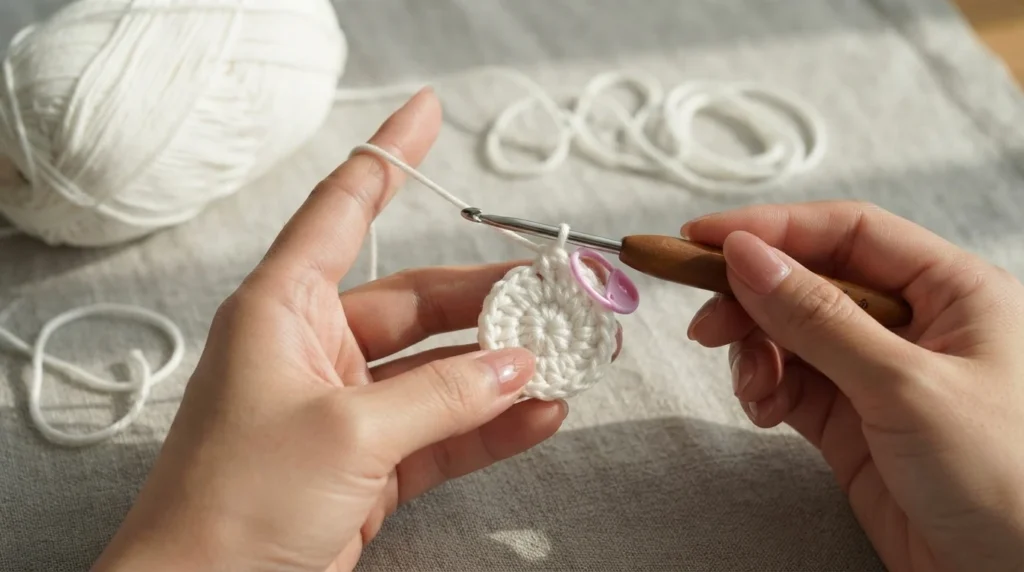
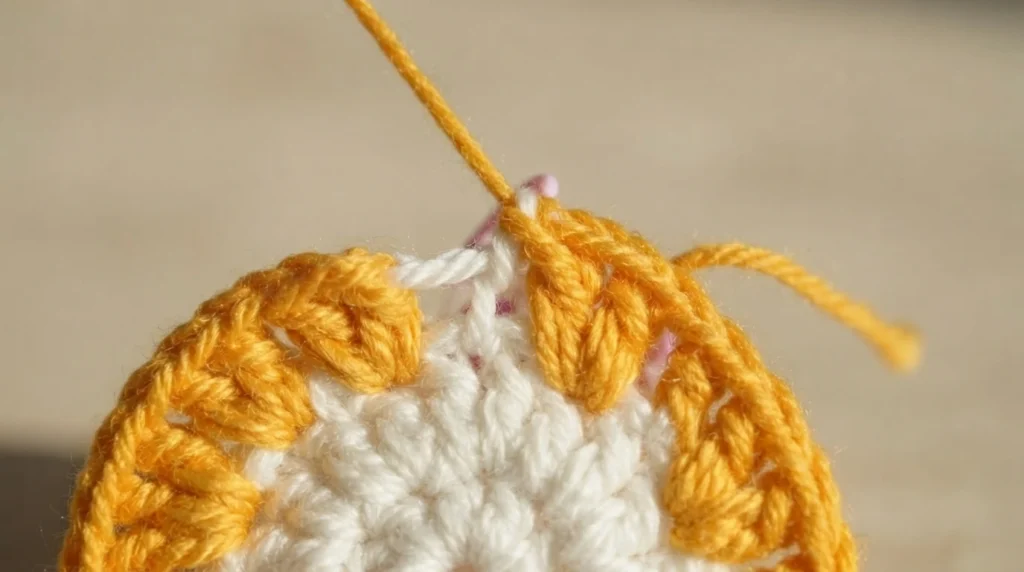
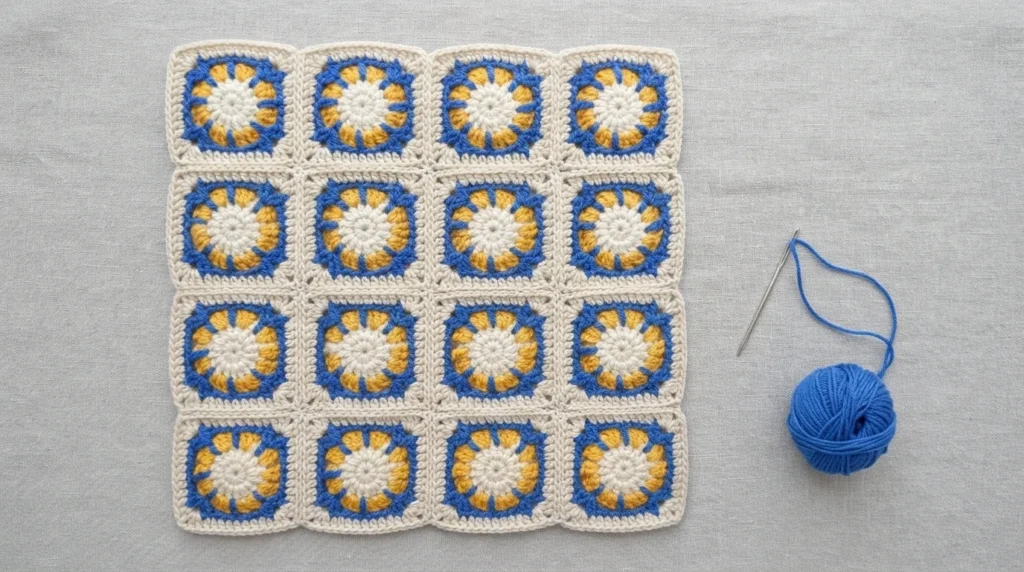
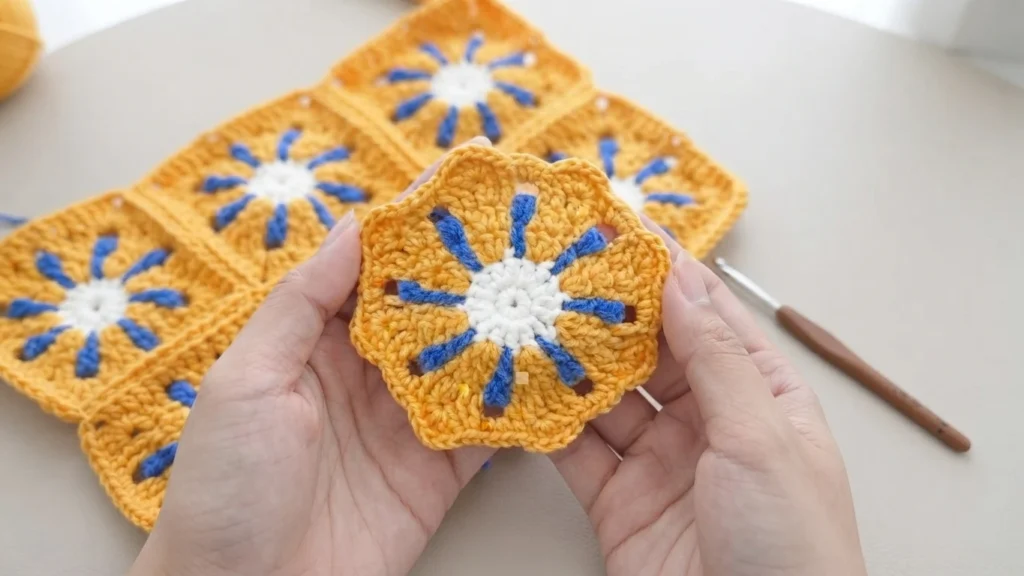
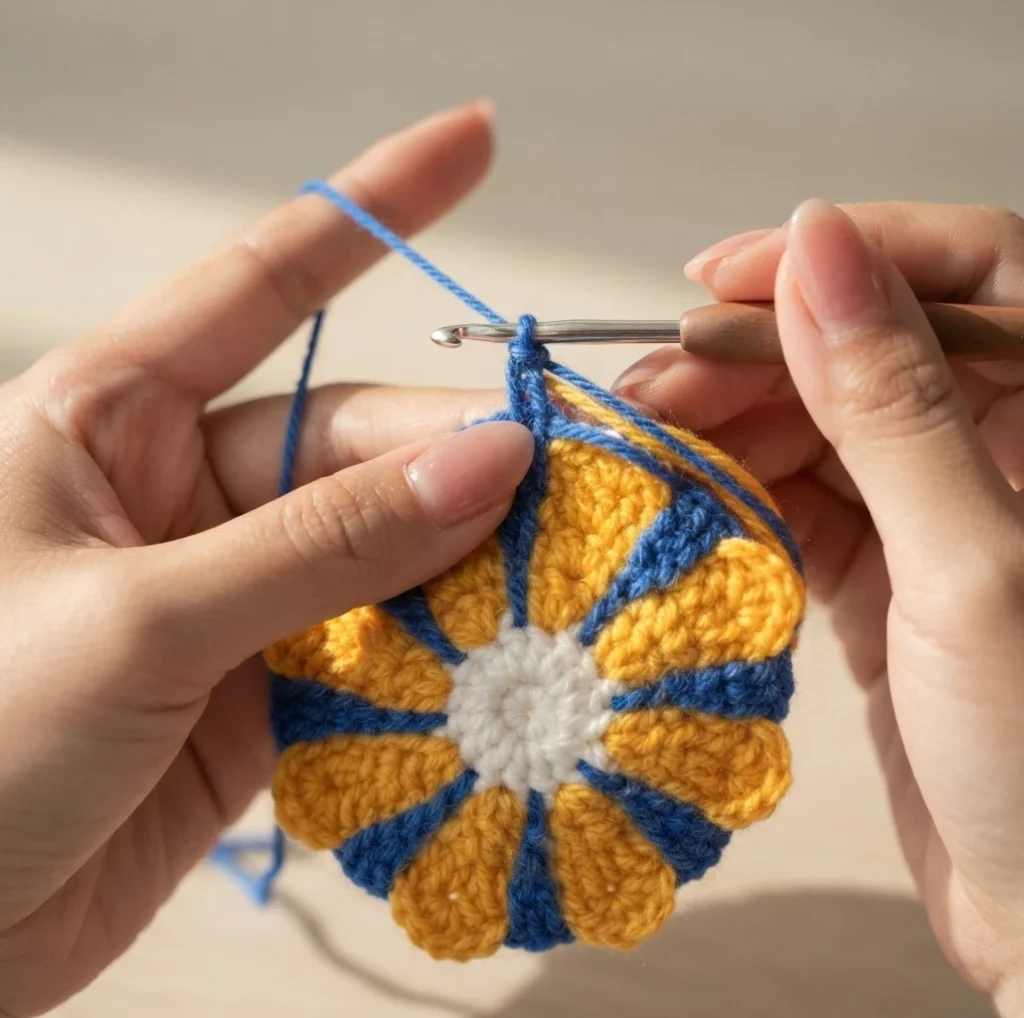

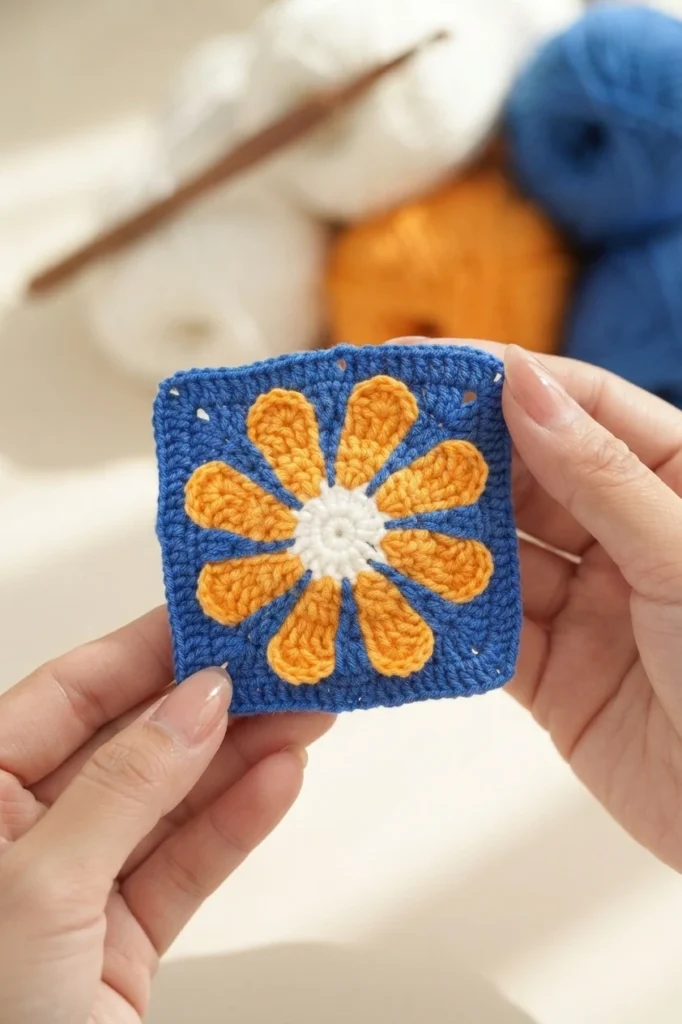
The tutorial uses different yarn colors for crocheting and assembly, and makers may choose any colors. It also shares two color-changing techniques for smooth, professional transitions.
The motif starts with a magic ring: 8 single crochet, a slip stitch join and chain 3. Round 2 adds a double crochet in the same stitch plus 7 double crochet increases. Round 3 changes color, pairing two double crochet in one stitch with chain 1 spaces and skipped stitches. Round 4 works double crochet into those skipped stitches with chain 4 spaces, bringing the previous round’s yarn to the front.
Rounds 5 through 7 grow the motif with double crochet increases and chain spaces. Round 8 works 5-double-crochet shells between single crochet, then fastens off and weaves in ends. Round 9 adds further double crochet increases, and Rounds 10 and 11 build the outer edge with single crochet, half double crochet and double crochet around (double crochet increase, chain 2, double crochet increase) corners. Round 11 finishes with a slip stitch join and chain 1, then fastening off and weaving in ends. When changing colors, carry the yarn along the back instead of cutting it.
How to Seam the Granny Square
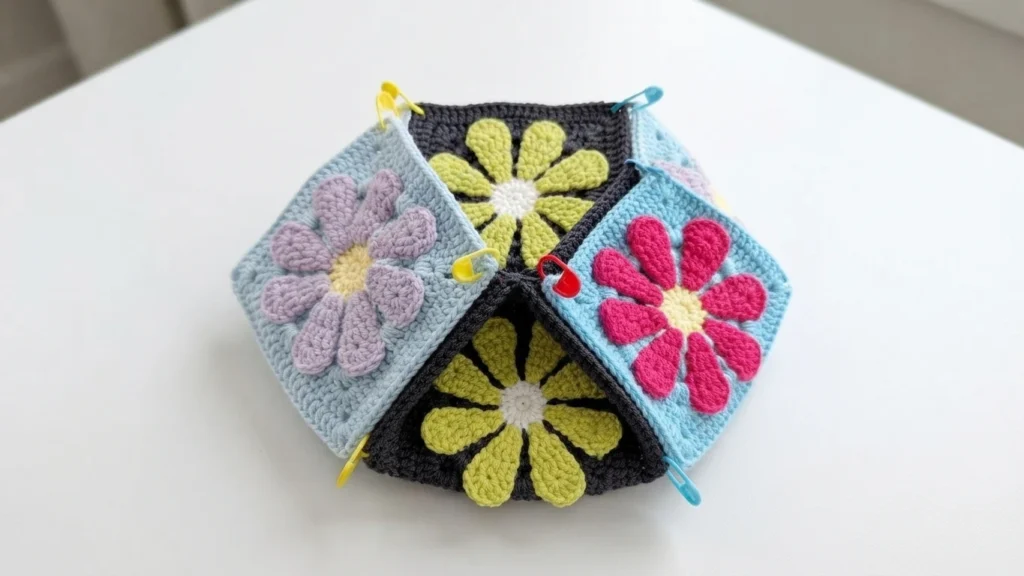
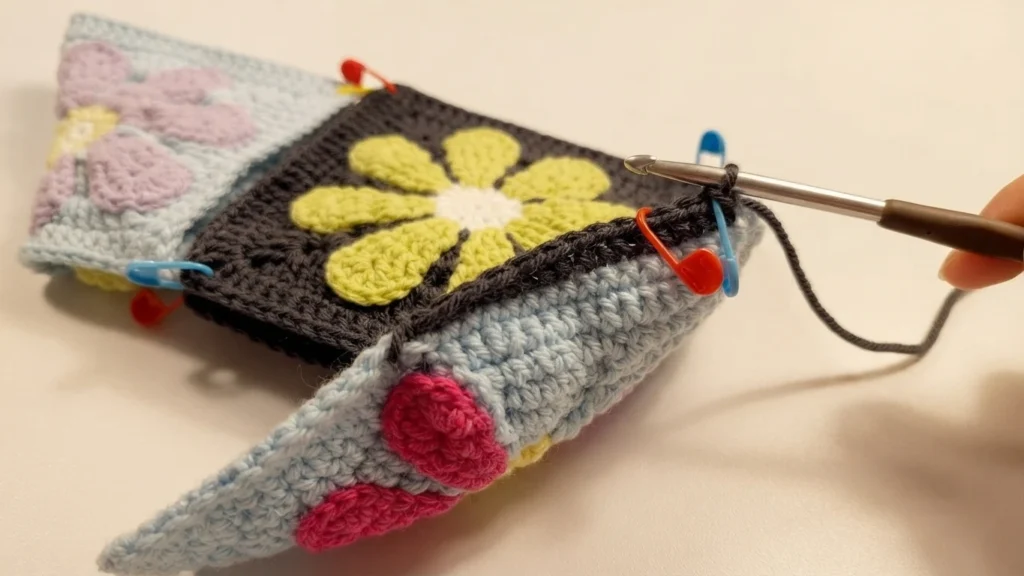
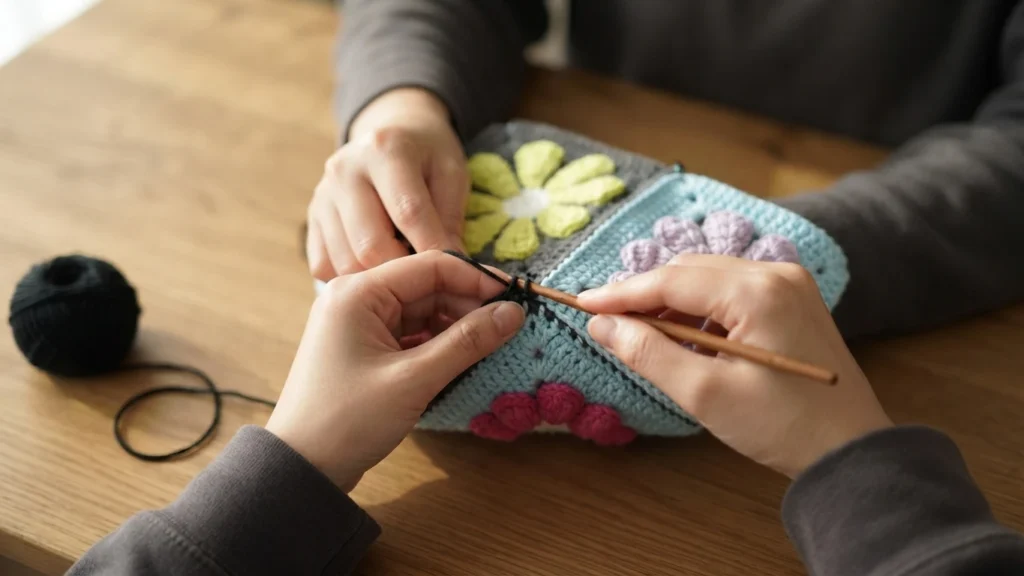
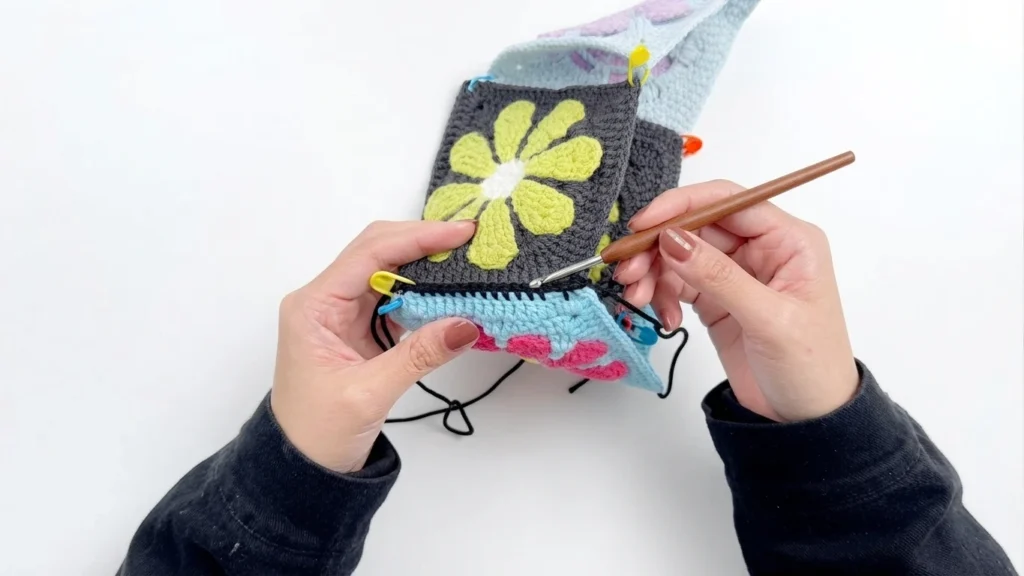
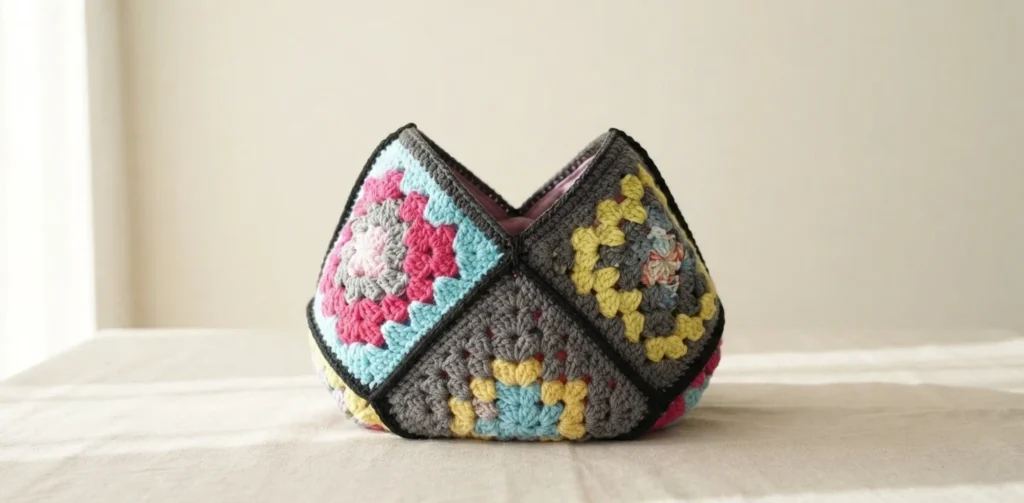
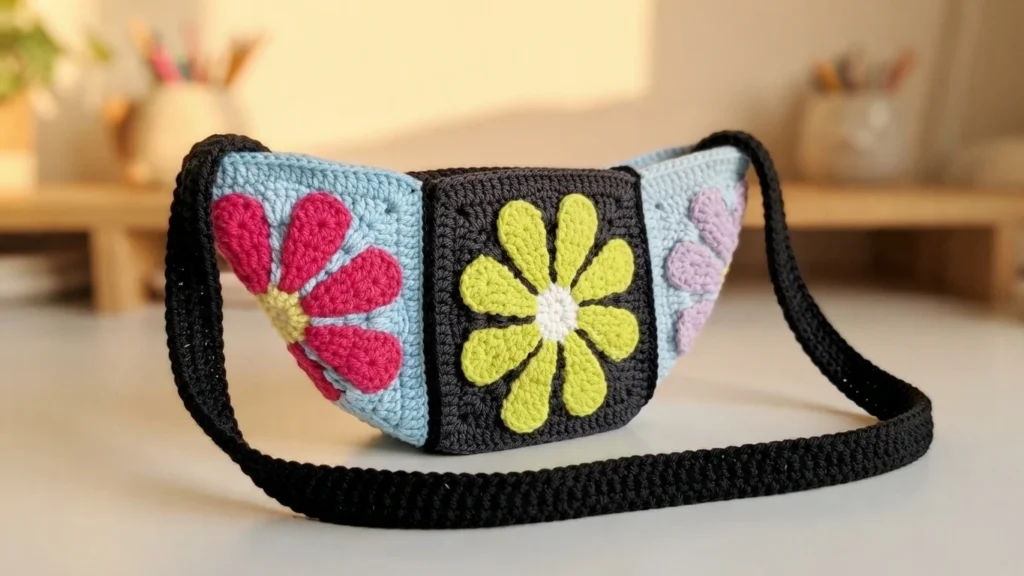

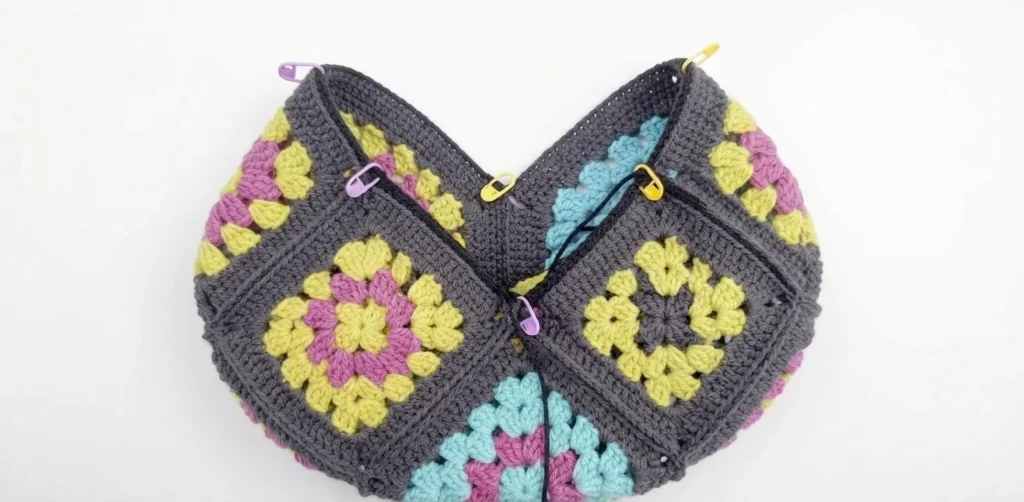
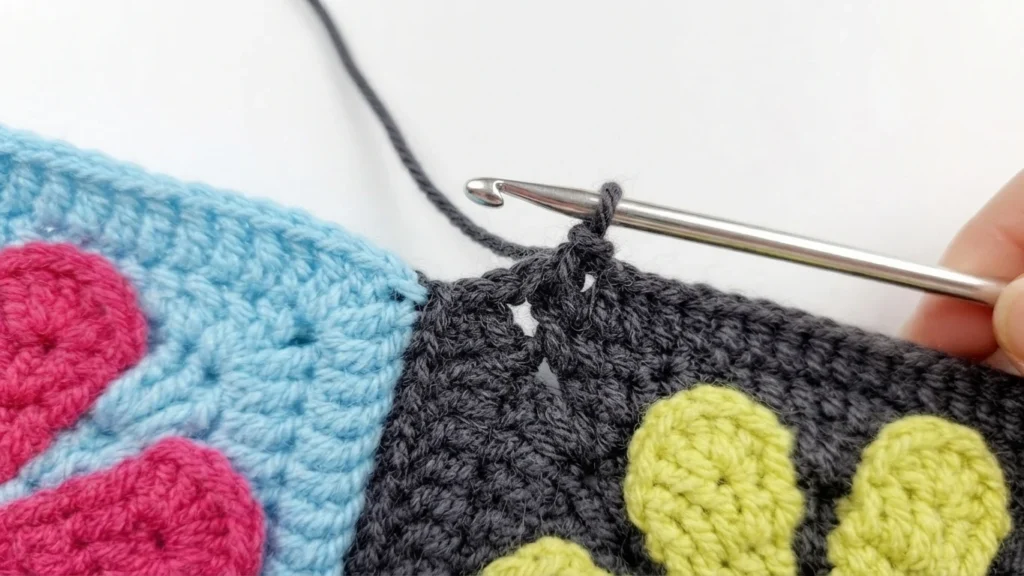
Arrange the completed squares and secure them with stitch markers. Fold both sides and secure again with stitch markers to form the dumpling-style bag shape.
Seam with a slip knot on the hook using the pull-through method, keeping stitches loose to preserve the shape and taking care at crossing transition points. Repeat on the other side, seam the bottom with mattress stitch, then cut the yarn and weave in ends.
How to Crochet the Bag Opening

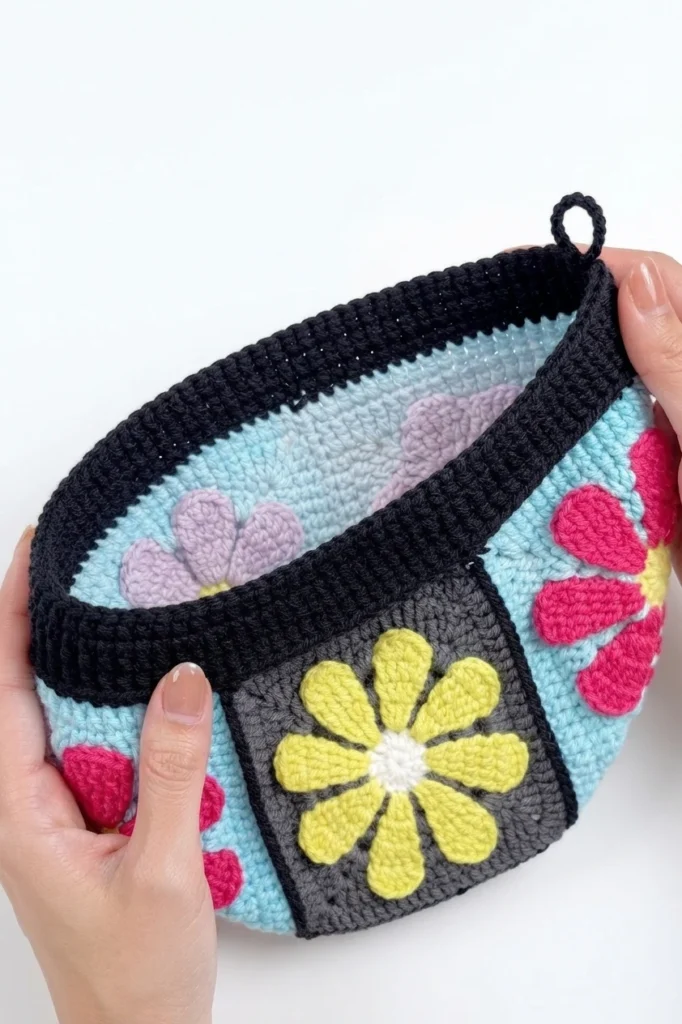
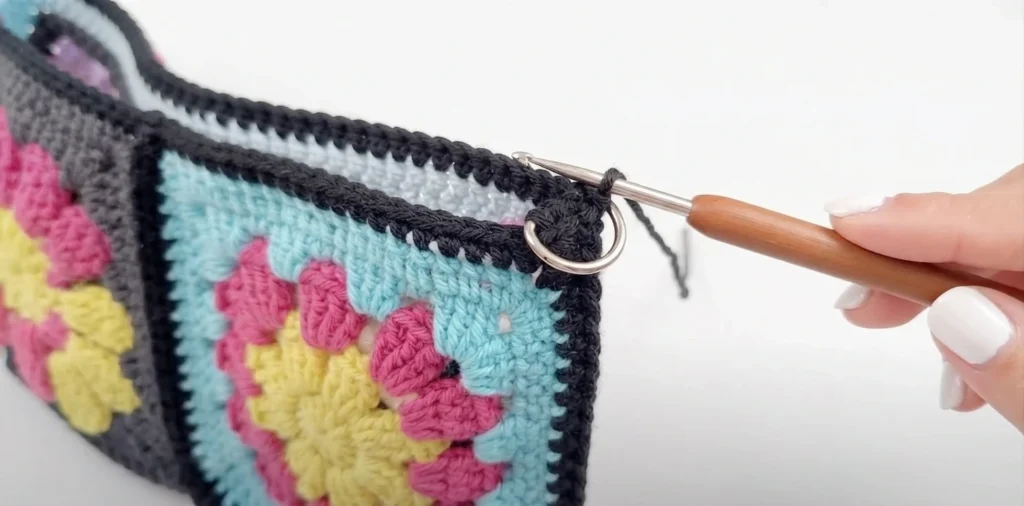
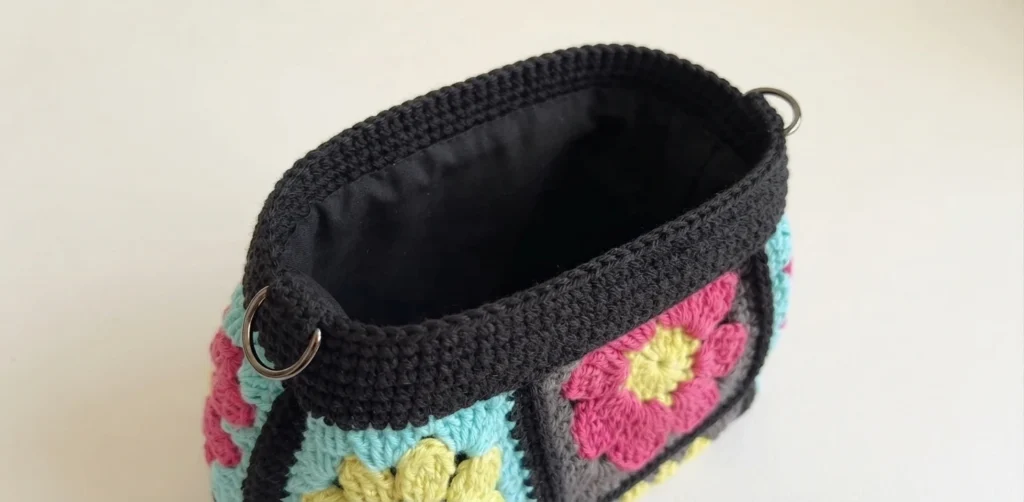
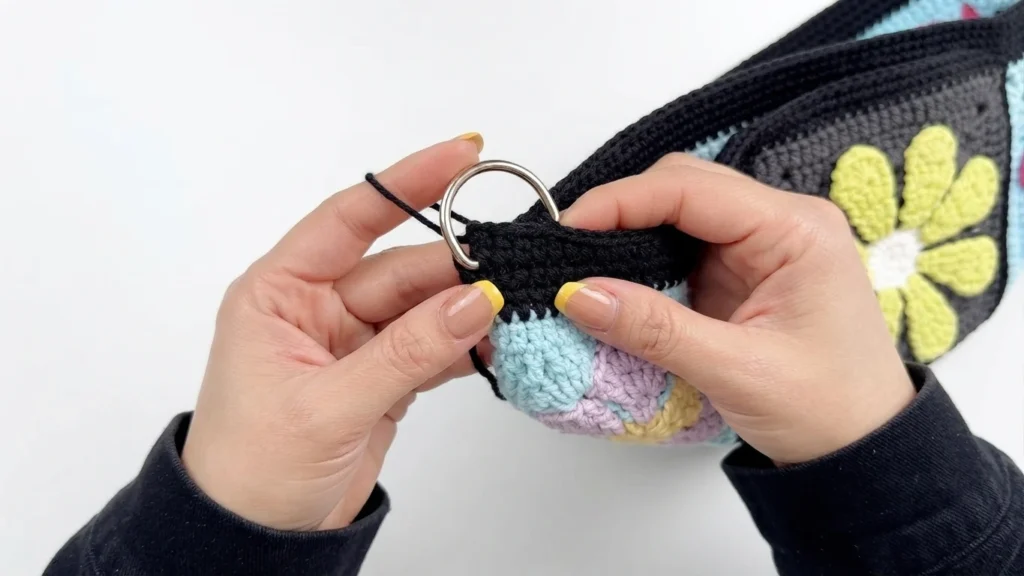
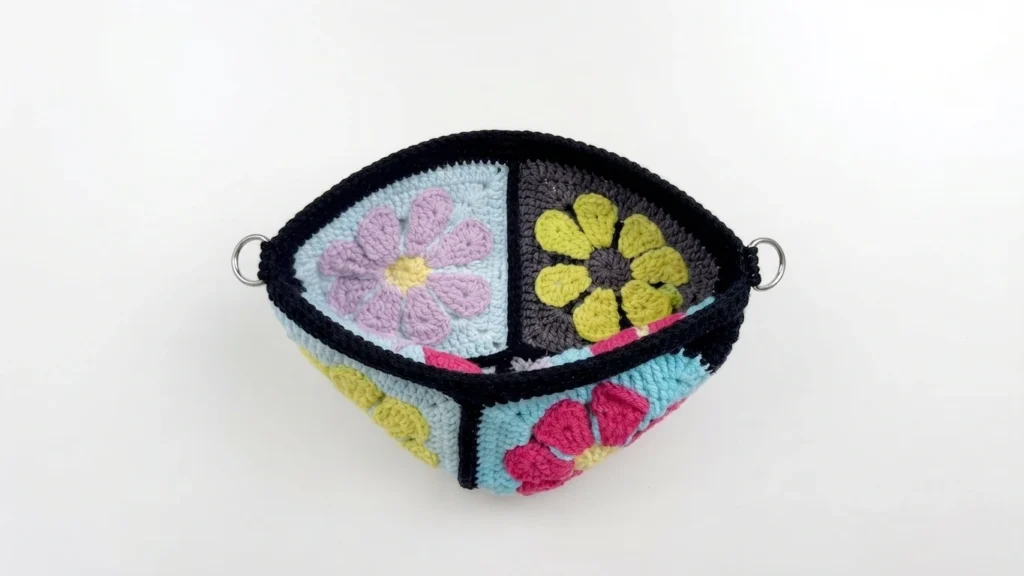

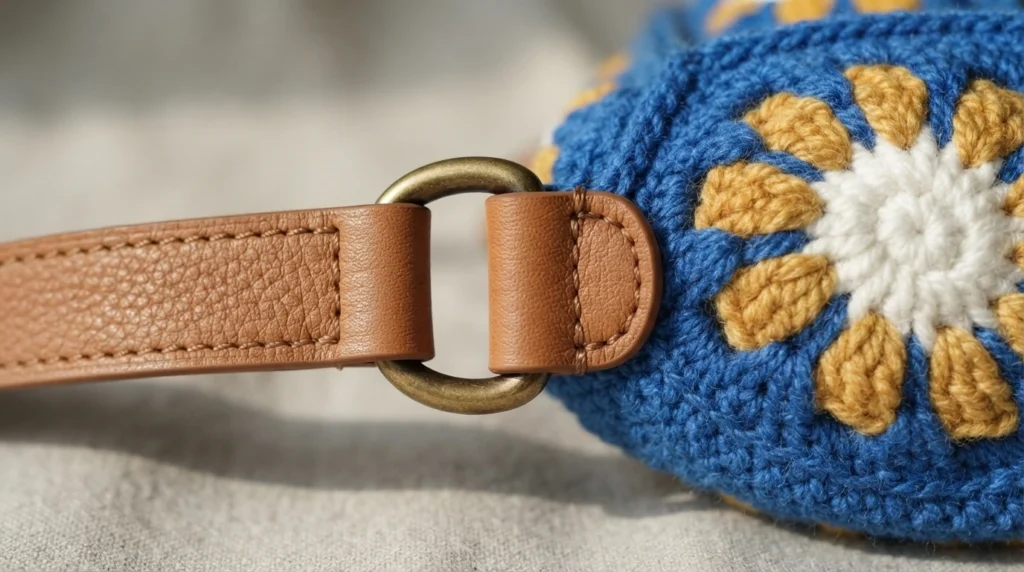
Attach the yarn with a slip stitch and work single crochet around the opening, watching the transition between the two granny squares. Join each round to the first stitch. On the final round, add a D-ring, continue in single crochet, then add the second D-ring on the opposite side.
How to Seam the Lining
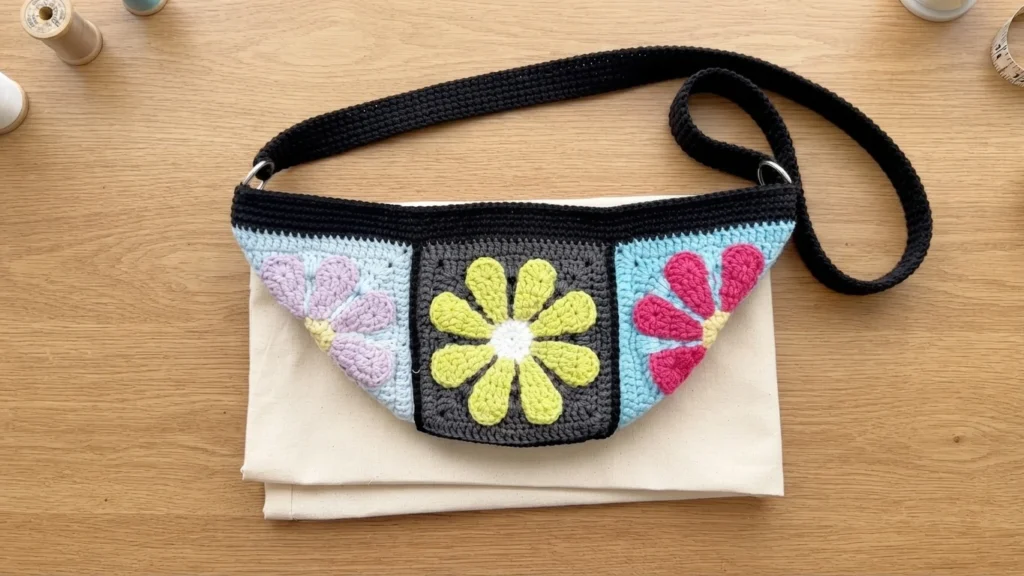

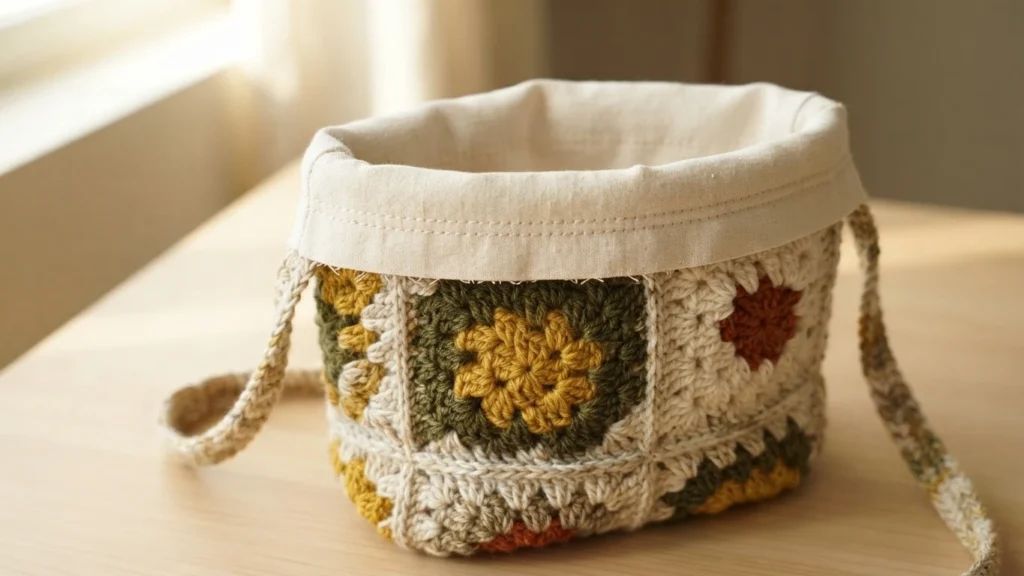
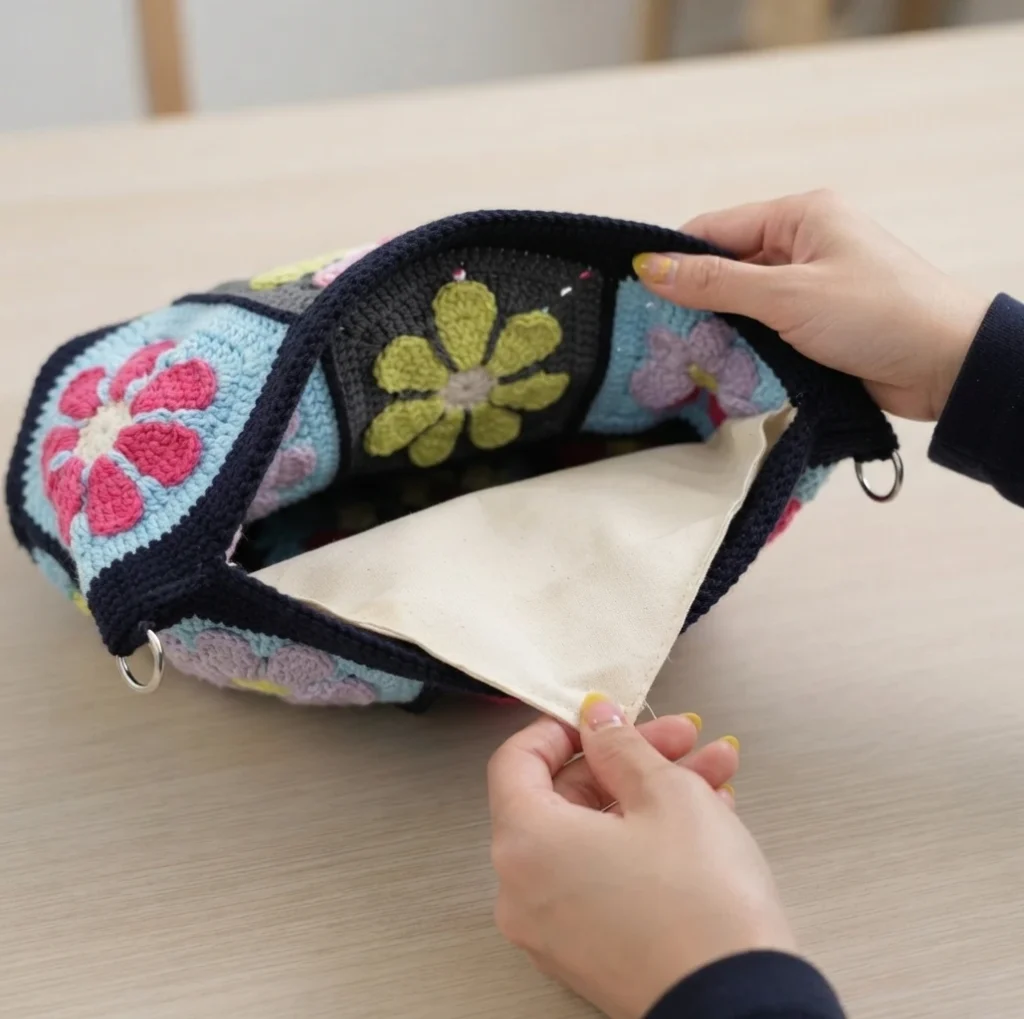
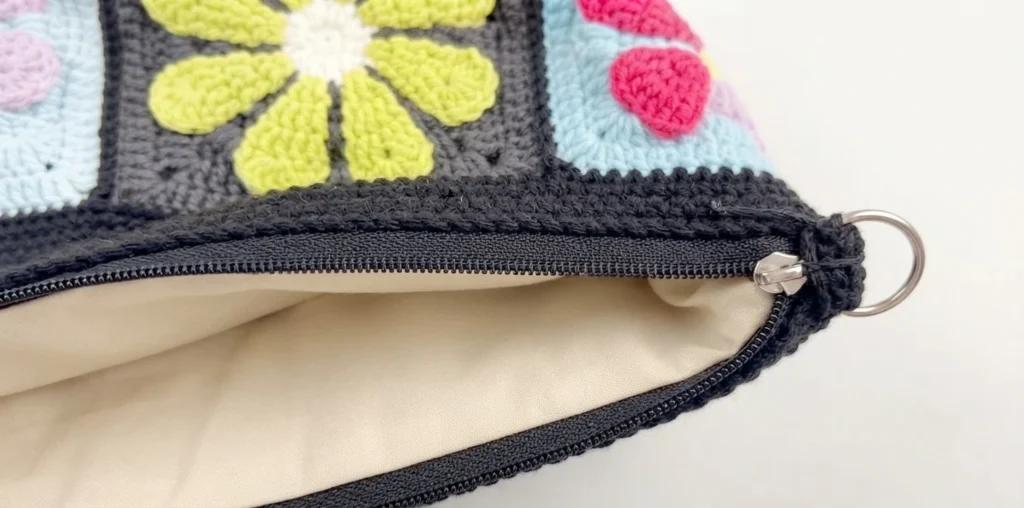
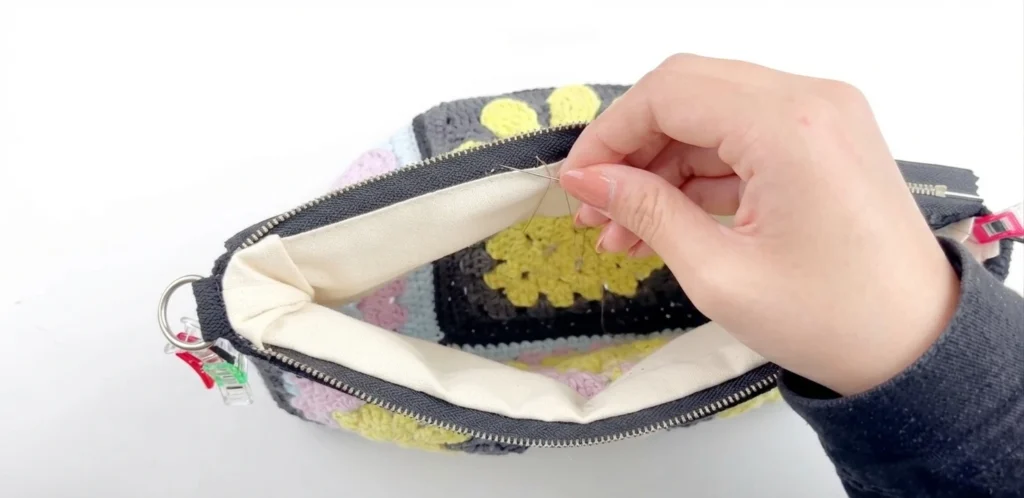
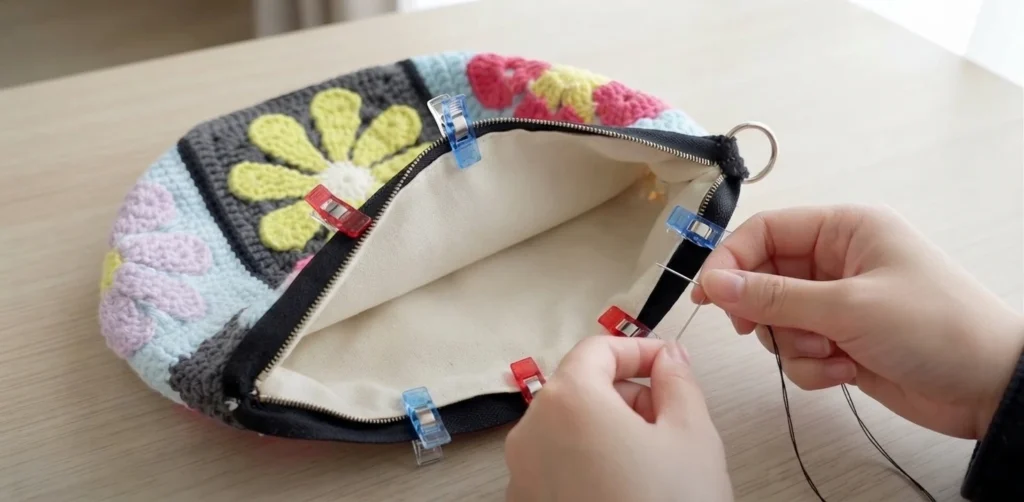
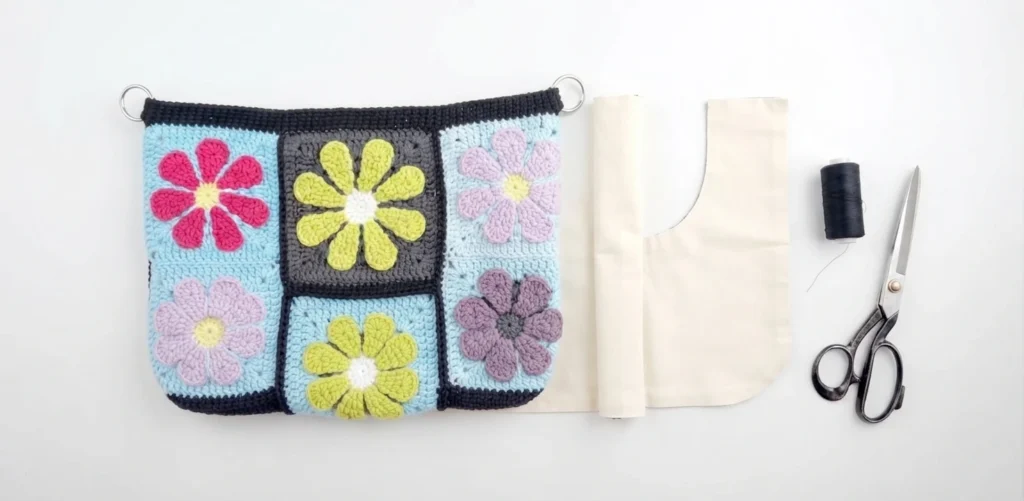

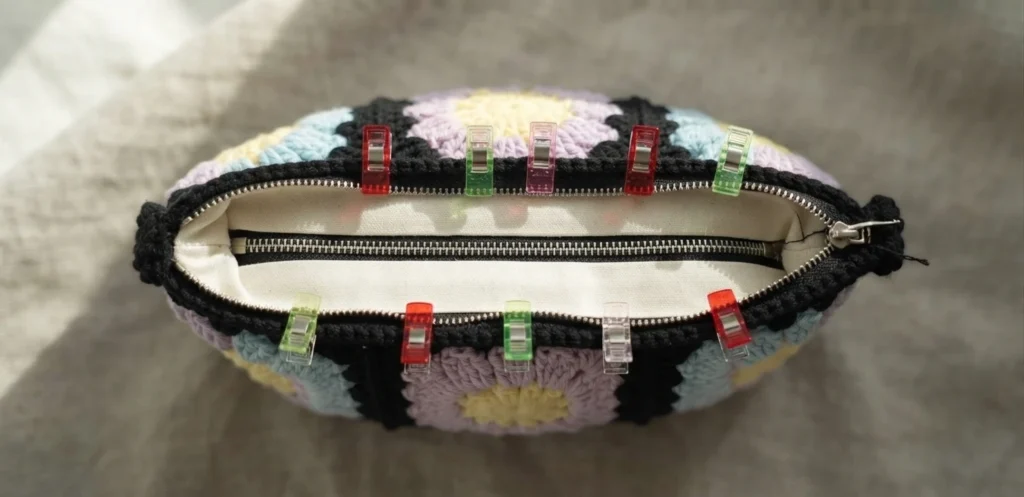
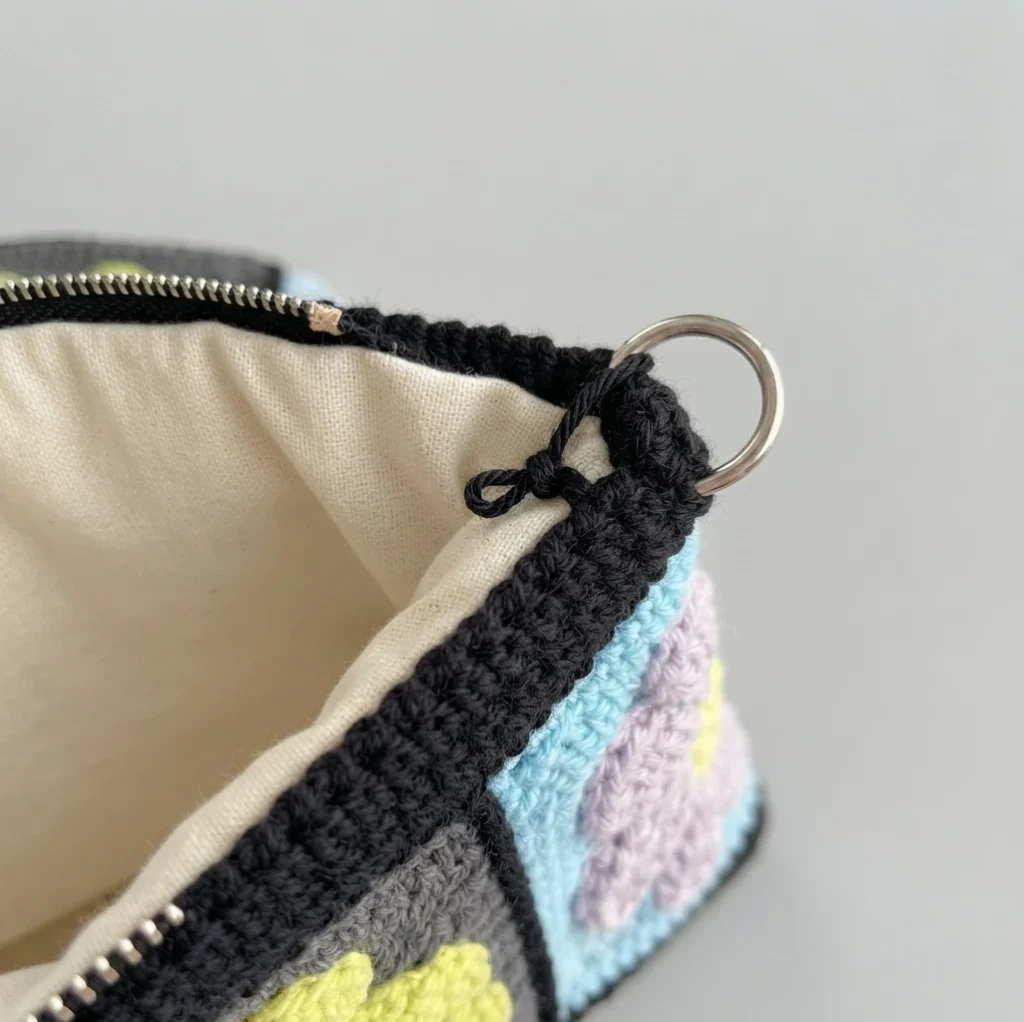
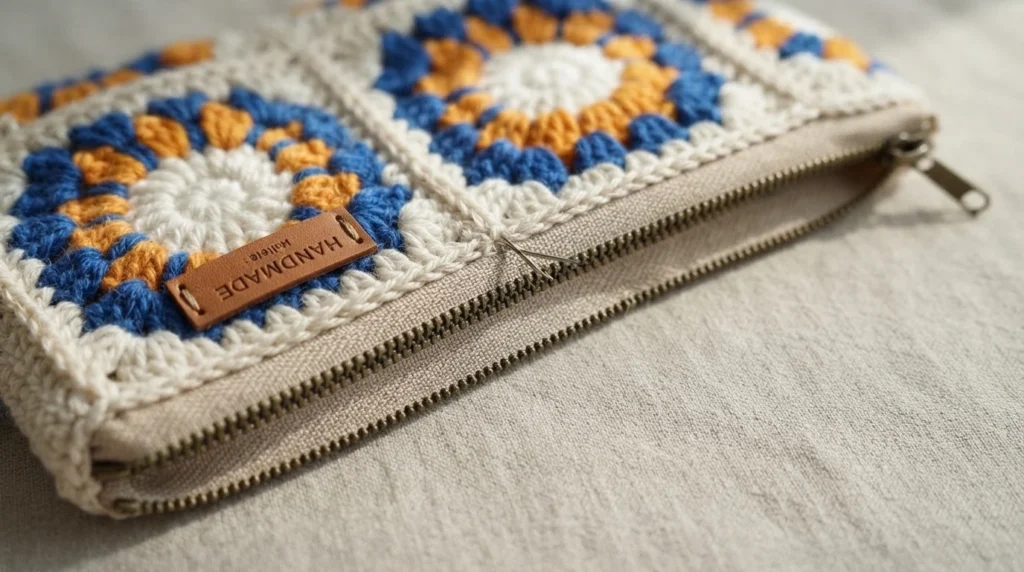
Fold the lining fabric under the bag body and cut it to shape. Sew the edges with multiple stitches and test the fit inside.
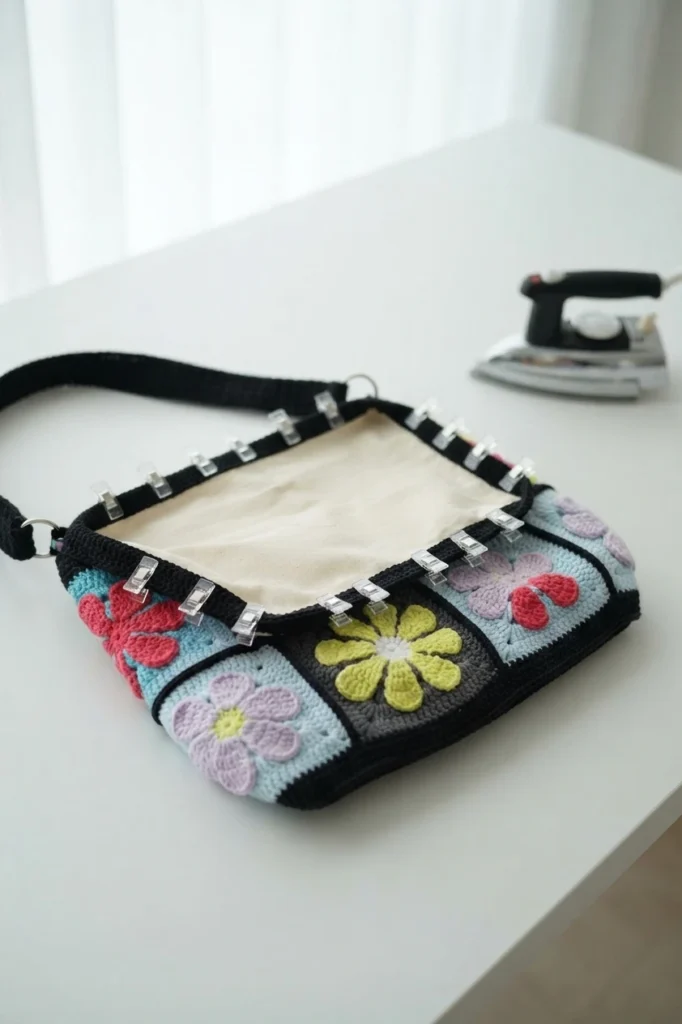
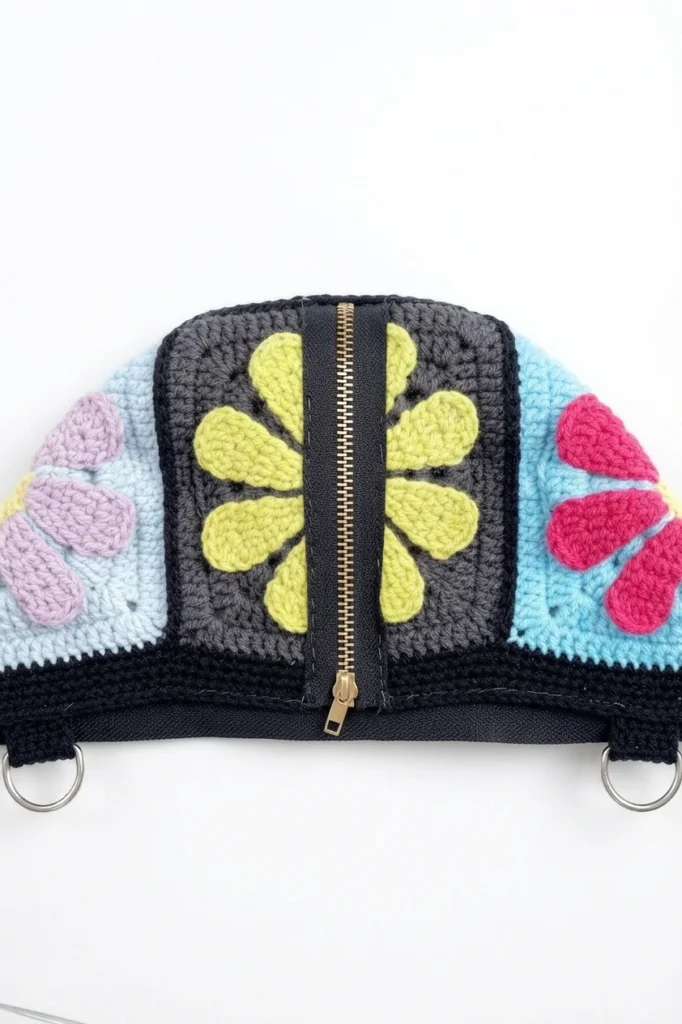
Iron the lining flat, clip it inside the bag and center the zipper with clips. Sew with a locking stitch, knot the thread and hide the end.
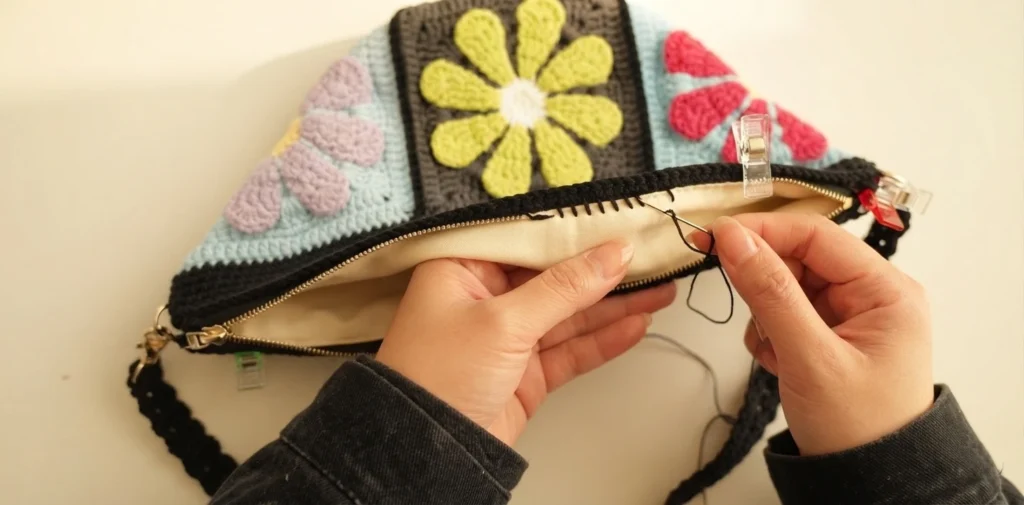
Sew the lining with invisible stitches, tucking the zipper-end fabric inside. Finish the opposite side of the zipper, then knot off. Tip: press all edges and use plenty of clips before sewing.
How to Complete the Final Assembly
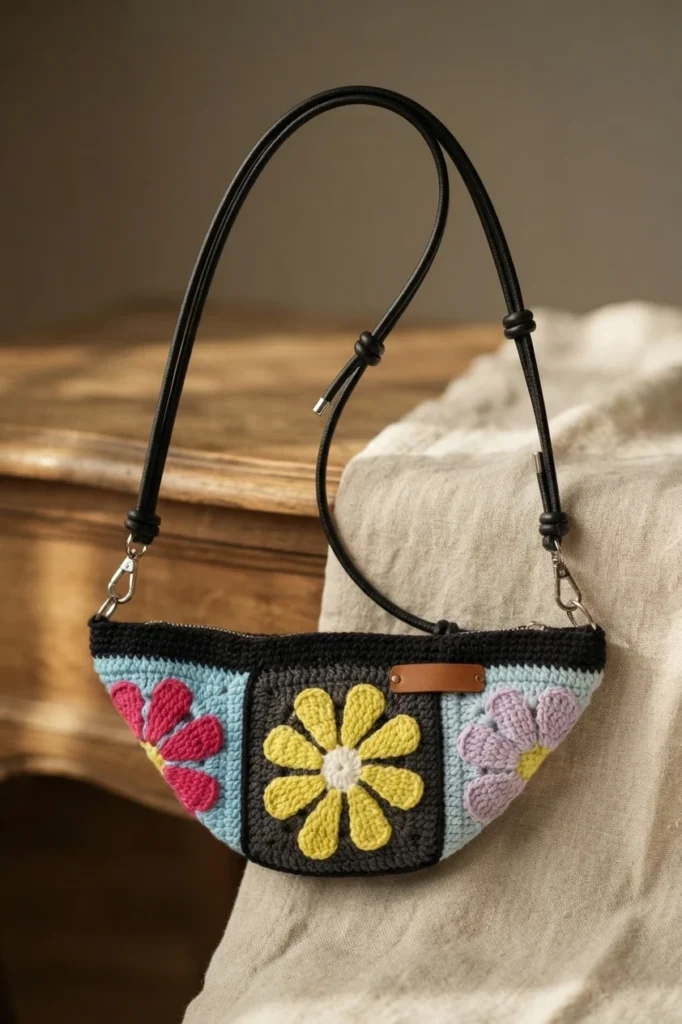
Attach the straps and leather label to complete the bag. Tip: block the squares before seaming for uniform size.
How to Join Granny Squares
The bag itself is joined with one simple method, but you may prefer a different finish for your own squares. The designer also shares a comprehensive guide to 11 ways to join granny squares, detailing every method she knows and loves. Each technique brings its own special touch to a finished piece, so browse the options and choose the one that best suits your style.
How to Weave in Ends Crochet Granny Square
A professional finish starts with how the loose ends are handled. The source shares 3 ways to weave in ends, described as techniques perfected over years of crocheting and used in all of the designer’s projects. Each method secures the tails so the squares stay sturdy and polished, keeping every round of the finished bag neat from all sides.
Daily Care Tips
Gently brush dust off the bag after each use. Keep sharp objects away from the stitches, avoid overstuffing, and trim loose threads carefully with scissors.
Washing Methods
Hand wash with lukewarm water and gentle soap, squeezing water through the fabric, never wringing. Reshape while damp; lay flat to dry away from direct sunlight.
Storage Suggestions
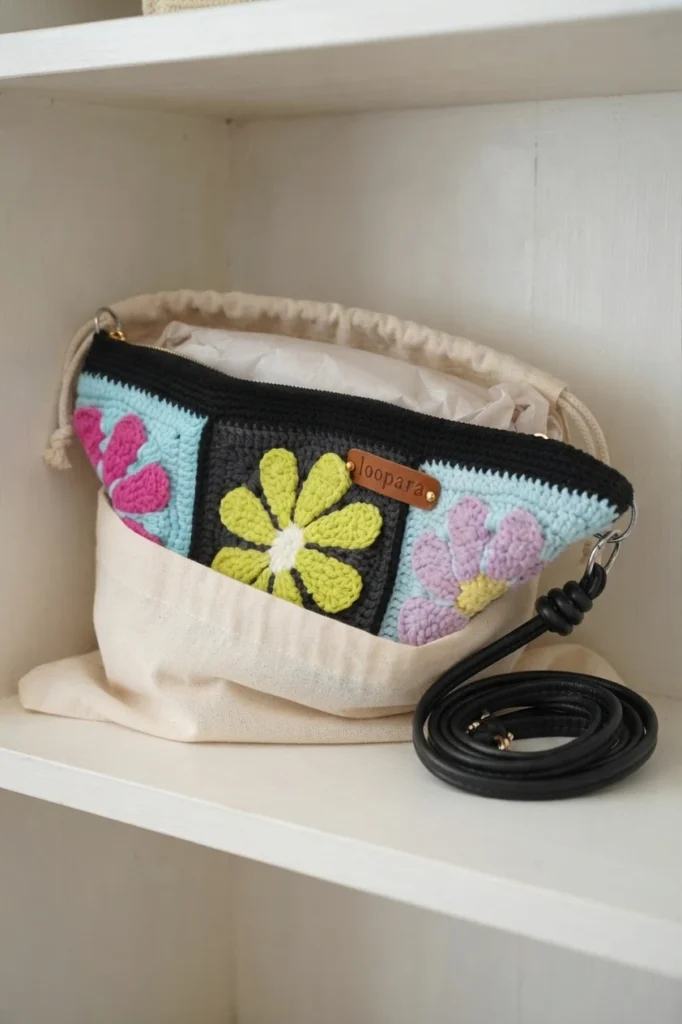
Lightly stuff the bag with tissue paper before storing. Keep it cool, dry and away from sunlight, ideally in a breathable cotton bag. For longer storage, ensure it is completely clean and dry.
Crochet Granny Square Crossbody Bag
On the source page, the pattern carries a 5.0-star rating from one user. Readers can pass the project along with share options for Twitter, Facebook, Pinterest and Whatsapp, making it easy to send the tutorial to a crochet friend.
Category
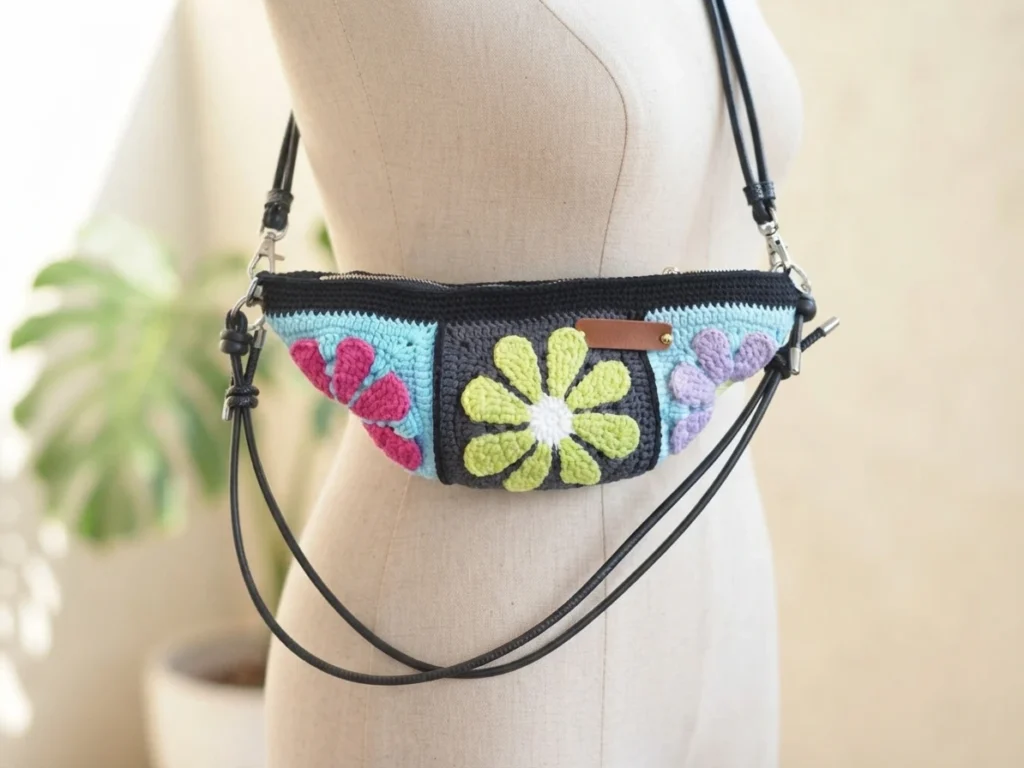
Filed under the Crochet Granny Square Bag category, this petite design pairs vintage charm with modern style. It is sized for daily essentials such as a phone, keys and cards, and its handmade texture adds a personal touch to any outfit.
Materials Needed
You will need:
- Yarn: Loopara 5ply combed cotton
- Hook: 3.0mm
- Scissors
- Yarn needle
- Stitch marker
- Leather label
- Zipper
- D-shaped buckle
- Leather bag strap
How to Crochet Granny Square Crossbody Bag - Step by Step
The motif runs R1 through R11: magic ring, 8 single crochet, slip stitch join and chain 3, then increases, chain spaces and color changes from R3. Several rounds bring the previous round’s yarn to the front before joining.
Round 8 closes with fastening off and weaving in ends. Rounds 9 to 11 form the border with (double crochet increase, chain 2, double crochet increase) corners; Round 11 ends with a slip stitch join, chain 1, fastening off and weaving in ends.
Granny Square Assembly
Arrange the completed squares and secure them with stitch markers, then fold both sides and secure again to form the dumpling-style bag shape.
Seam with a slip knot on the hook using the pull-through method, keeping it loose to preserve the shape. Mind the crossing transition points, finish the bottom with mattress stitch, then cut the yarn and weave in ends.
Bag Opening Assembly
Attach the yarn with a slip stitch and single crochet around the edge, watching the transition between the two squares. Join each round to the first stitch. On the final round, add a D-ring, then the second D-ring on the opposite side.
Lining Assembly
Fold the lining fabric under the bag body and cut it to shape. Sew the edges with multiple stitches and test the fit inside the bag.
Iron the lining flat, clip it in place and center the zipper with clips. Sew with a locking stitch, then attach the lining with invisible stitches, tucking the zipper-end fabric inside. Knot, cut and hide the ends.
Final Assembly
Attach the straps and the leather label to complete the bag.
Notes
When changing colors, carry the yarn along the back instead of cutting it. Press lining edges with an iron and use plenty of clips. Block the squares before seaming for uniform size.
Related reading: Crochet Granny Square Bucket Bag Pattern (Pattern): Pattern Overview and Crochet Granny Square Top Short Sleeves: Pattern Overview.
Recent Post

The source site’s recent posts are free flower patterns with a PDF and beginner tutorial: Winter Jasmine, Rouge Rose, Hibiscus Flower, Dried Violet Flowers and Lafitte Rose.
Categories
Site categories: Crochet Flower, Crochet Leaf (23), Granny Square (125), Crochet Bag, Crochet Stitch, Crochet Hat and Crochet Animals.

1 thought on “Crochet Granny Square Crossbody Bag (Pattern): Pattern Overview”